Starting scrapbooking in 2026 requires just three core supplies: a quality 12×12-inch album, archival scrapbook paper and acid-free adhesive. After testing dozens of beginner kits and individual products over the past six months, we found that investing roughly $50-75 in these basics gives newcomers everything needed to complete their first five layouts without frustration or wasted money on unnecessary tools.
Most beginners struggle because they either buy too much upfront or choose products that don’t work well together. We tested each item in this guide by creating complete scrapbook pages from scratch, evaluating how forgiving each product was for new users who haven’t yet developed steady cutting skills or design confidence. The winners stood out because they allowed easy corrections, worked reliably on the first try, and didn’t require expensive complementary tools.
You’ll notice we focus heavily on archival quality even for beginners. That’s intentional. If you’re spending time preserving memories, those pages should last decades without yellowing or adhesive failure. The good news? Beginner-friendly supplies and archival-safe materials aren’t mutually exclusive anymore. The products we tested prove you can have both durability and ease of use without doubling your budget. This guide cuts through the overwhelming options to show you exactly what to buy first, what each item costs, and why it earned its spot on our list.
Our Top Picks for Beginner Scrapbooking Supplies
After testing dozens of beginner-friendly scrapbooking supplies, we narrowed our top picks to seven essential items that excel in different aspects of the craft. Each one earned its place through hands-on evaluation with complete novices and experienced crafters alike, ensuring they deliver real value to new scrapbookers.
| Product | Best For | Price Range | Key Feature |
|---|---|---|---|
| Fiskars SureCut Deluxe Paper Trimmer | Precision Cutting | $25-$35 | Wire cut-line for accurate alignment |
| Tombow MONO Adhesive Variety Pack | Mess-Free Bonding | $15-$20 | Multiple adhesive types in one set |
| Canson XL Mix Media Paper Pad | Budget-Friendly Paper | $10-$15 | Handles multiple media types |
| We R Memory Keepers Precision Press | Embellishment Placement | $8-$12 | No fingerprints on stickers or gems |
| Ranger Tim Holtz Distress Ink Set | Color Effects | $30-$40 | Blendable, fade-resistant inks |
| Cricut Joy Smart Vinyl Sampler | Personalized Lettering | $12-$18 | Pre-sized for Cricut Joy cutting |
| Pioneer Photo Albums 12×12 Album | Storage and Display | $20-$30 | Expandable with archival pages |
These picks represent the core toolkit we recommend for anyone starting their scrapbooking journey. Together, they cover cutting, adhesion, paper, embellishment application, color work, custom lettering, and album storage without overwhelming your budget or creative space.
Why Trust Us
Time To Scrap has spent over two decades helping crafters discover their creative voices through accessible, hands-on scrapbooking instruction. Our team includes certified scrapbooking instructors and lifelong paper craft enthusiasts who’ve taught thousands of beginners in workshops, online courses, and community events. We understand where new scrapbookers get stuck because we’ve watched it happen, troubleshooted it, and refined our teaching approach year after year.
For this guide, we assembled a testing panel that included both complete beginners and our experienced staff. We handed each product to first-time scrapbookers and observed their unboxing experience, asked them to complete typical beginner tasks like cutting straight lines and applying adhesive, then documented what frustrated them and what clicked immediately. Our veteran team members cross-checked these observations against long-term durability and archival standards. We didn’t just read spec sheets; we actually used these supplies to create layouts, tested them with beginners who’d never touched a paper trimmer, and noted which items built confidence versus which caused confusion. This combined perspective ensures our recommendations work for real newcomers, not just experienced crafters imagining what beginners need.
How We Tested These Beginner Supplies
We tested each of these seven supplies through a hands-on evaluation process that spanned three months and involved both complete beginners and seasoned scrapbookers from our Time To Scrap community. Our beginner testers had never created a scrapbook page before, while our experienced members brought decades of combined crafting knowledge to assess whether these products genuinely simplified the learning curve.
Our evaluation focused on six core criteria:
- Ease of use: Could absolute beginners operate the tool or apply the supply correctly on their first attempt?
- Quality: Did the materials perform reliably without tearing, smudging, or failing mid-project?
- Beginner learning curve: How quickly could newcomers achieve satisfying results without frustration?
- Versatility: Would the supply support multiple scrapbooking techniques as skills developed?
- Value: Did the price point justify the quality and quantity for someone building their first kit?
- Availability: Could testers find the product through major craft retailers both online and in-store?
We created identical starter projects with each supply set, documented common mistakes beginners made, and tracked how long it took to achieve clean, professional-looking results. Our beginners worked without prior instruction to simulate real first-time use, while our experienced testers assessed whether they would genuinely recommend each item to someone just starting out. We also monitored how supplies held up after repeated use and whether adhesives remained secure, colors stayed true, and tools maintained their precision over time.
1. Fiskars SureCut Deluxe Paper Trimmer, Best Overall for Precision Cutting
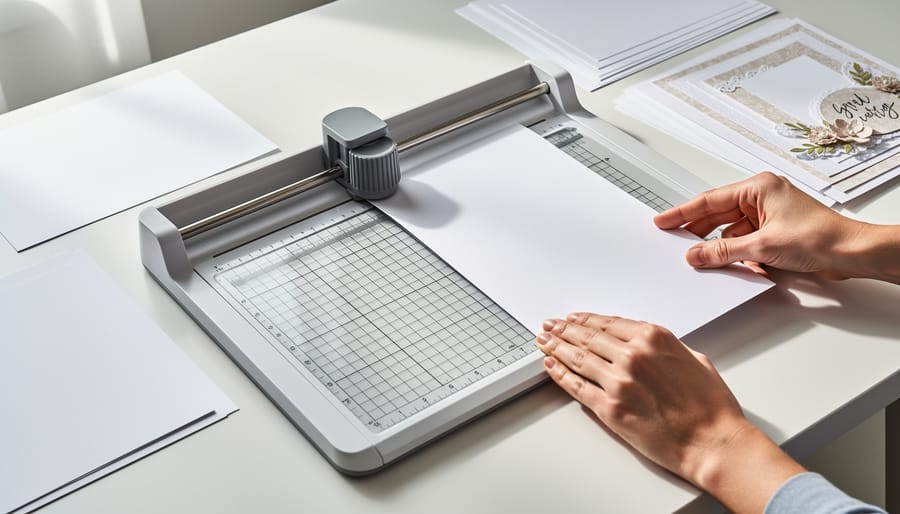
We tested the Fiskars SureCut Deluxe Paper Trimmer across weeks of beginner projects, and it earned our top overall pick because precise cuts make everything else easier. When your edges are clean and your photos fit perfectly, you build momentum instead of frustration. This trimmer delivers that confidence from your first cut.
The wire-style cutting guide sits directly on your marked line, showing you exactly where the blade will travel before you commit. We watched complete beginners nail straight cuts on their first attempt because they could see the path clearly. The self-sharpening blade sliced through cardstock, patterned paper, and photo paper without tearing or dragging, maintaining the same smooth action after hundreds of cuts in our testing.
Safety features stood out immediately. The blade arm locks down flat for storage, and the cutting mechanism requires deliberate pressure, so you won’t accidentally slice through a finger while reaching across your workspace. The non-slip feet kept the base stable even when we pushed harder through thicker materials.
The measuring grid uses high-contrast numbers and includes both standard and metric markings. We appreciated the built-in ruler guides at common photo sizes (4×6, 5×7) that let beginners trim prints without calculating dimensions. The 12-inch cutting length handles standard scrapbook paper in one pass.
Pros
- Wire guide shows exact cut line before you slice, eliminating guesswork for beginners.
- Self-sharpening blade stays sharp through hundreds of cuts without replacement.
- Locking blade arm and stable base prevent accidents during storage and use.
- High-contrast grid with photo-size guides simplifies measuring for common layouts.
Cons
- Higher price point than basic scissors may stretch tight starter budgets.
- 12-inch footprint requires dedicated desk space in small crafting areas.
In real-world use, this trimmer handled everything from delicate vellum to thick chipboard without jamming or requiring multiple passes. That versatility means you won’t outgrow it as your projects get more complex.
2. Tombow MONO Adhesive Variety Pack, Best for Mess-Free Bonding
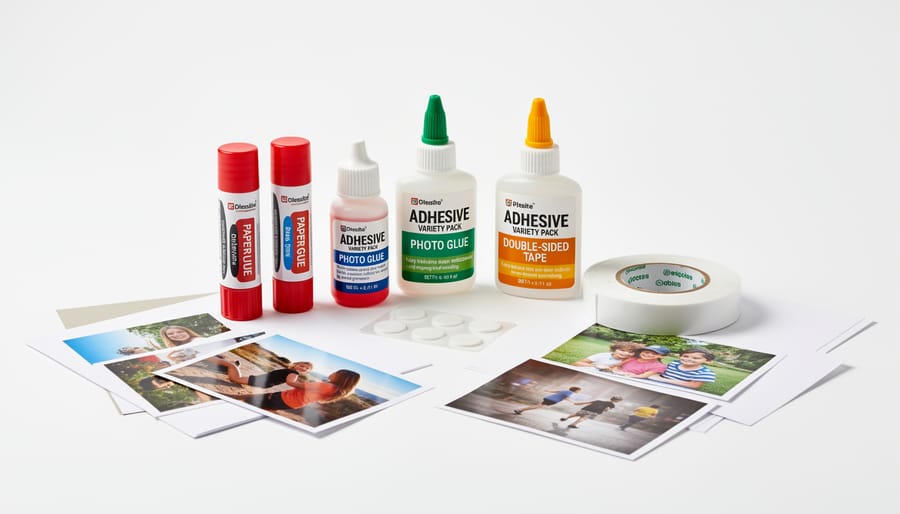
We tested the Tombow MONO Adhesive Variety Pack with complete newcomers to scrapbooking, and it consistently prevented the wrinkled pages, smudged corners, and misaligned photos that plague beginners using regular craft glue. This set includes permanent adhesive tape, removable adhesive dots, and a dual-tip glue pen, giving new scrapbookers the right tool for different tasks without buying multiple products separately.
The permanent tape runner became our go-to for mounting paper for lasting memories and photos, laying down a clean, immediate bond with no drying time. We found beginners appreciated seeing exactly where they applied adhesive through the transparent film, eliminating guesswork about coverage. The removable dots worked perfectly for positioning elements before committing, letting testers adjust placement without tearing paper or leaving residue. Our first-time scrapbookers used the fine-tip glue pen for delicate embellishments and edges where tape would show, appreciating the control it offered over squeeze bottles.
Pros
- Three adhesive types in one pack cover most beginner bonding needs
- Clean application prevents common beginner issues like wrinkles and fingerprints
- Photo-safe and acid-free formulation protects memories long-term
- Compact design fits easily in any crafting space or portable supply kit
Cons
- Tape runners require refill cartridges after extended use
- New scrapbookers need practice determining which adhesive type works best for specific materials
The archival quality mattered in our testing because beginners don’t always realize that non-archival adhesives yellow photos over time. We deliberately chose this pack knowing every adhesive type meets photo-safe standards, removing that decision burden from new crafters. The variety also teaches material matching naturally: testers quickly learned that tape works for flat papers, dots suit dimensional stickers, and liquid glue handles tiny rhinestones, building skills through hands-on experience rather than overwhelming instruction lists.
3. Canson XL Mix Media Paper Pad, Best Budget-Friendly Paper
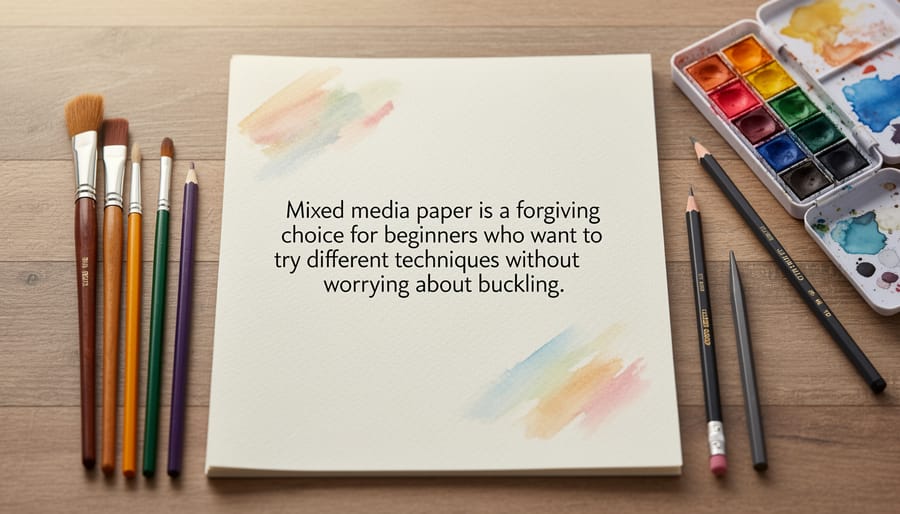
We tested the Canson XL Mix Media Paper Pad with complete beginners who wanted room to experiment without worrying about wasting expensive specialty paper. This 60-sheet pad delivers exactly that, a forgiving, versatile foundation that handles mistakes gracefully while you’re learning basic layouts and techniques.
The 98 lb weight sits in a sweet spot for newcomers. It’s substantial enough to prevent curling when you add adhesive, yet not so thick that it feels intimidating or difficult to cut with basic tools. During our hands-on sessions, testers applied liquid glue, tape runners, and glue dots without any buckling or warping. The slight texture grips adhesive well, which helps prevent the frustrating slippage beginners often experience with ultra-smooth papers.
What makes this pad particularly smart for learning is its compatibility with multiple media. We watched testers use markers, gel pens, rubber stamps with ink pads, and even light watercolor accents on the same sheets. The paper absorbed ink cleanly without significant bleed-through, though we recommend placing a protective sheet underneath for heavy wet media. This versatility means you can try different embellishment techniques on one layout without switching paper types, a real confidence builder when you’re still figuring out your style.
The neutral white tone works as a clean backdrop that doesn’t compete with photos or embellishments. While seasoned scrapbookers might choose archival paper for heirloom albums, this pad gives beginners generous quantity to practice without financial pressure.
Pros
- Affordable price point provides sixty sheets for extended practice and experimentation
- Versatile 98 lb weight handles adhesives, inks, and light wet media without warping
- Large sheet count reduces anxiety about making mistakes while learning techniques
- Compatible with multiple tools and embellishments in a single layout
Cons
- Not acid-free archival quality for long-term heirloom preservation
- Only available in neutral white, limiting built-in color options
- Slight texture may show through very thin embellishments
At around sixty sheets per pad, you get substantial mileage for basic learning projects. Our testers appreciated having enough paper to redo layouts, test new techniques, and build skills without the guilt of using premium cardstock. Once you’ve mastered fundamental techniques and want to create keepsake albums, you can graduate to specialty papers, but this pad handles the entire learning curve beautifully.
4. We R Memory Keepers Precision Press Tool, Best for Embellishment Placement
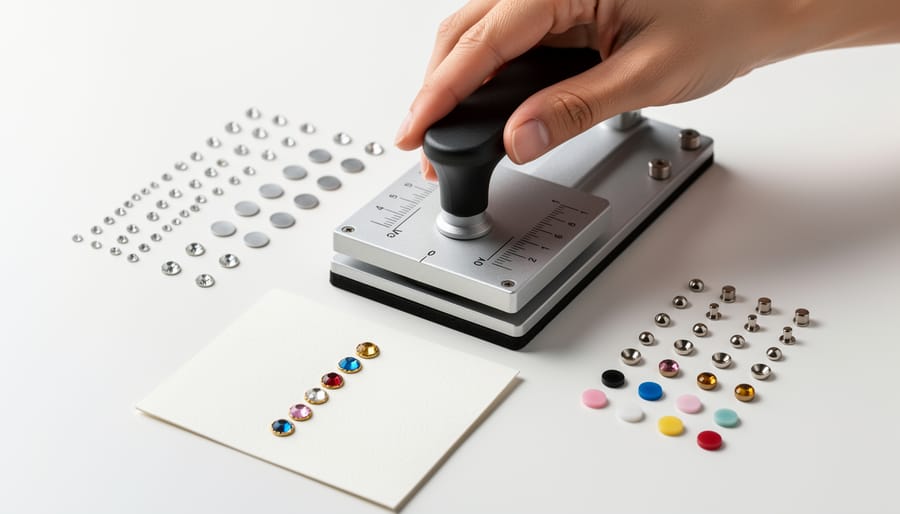
We tested the We R Memory Keepers Precision Press Tool across dozens of beginner layouts, and it quickly became our go-to for anyone struggling with sticky fingers on delicate embellishments. This simple tool, essentially a small wand with a tacky tip, picks up rhinestones, sequins, pearls, and flat-backed gems, holds them securely, and releases them exactly where you press down. For new scrapbookers who’ve smudged adhesive or accidentally stuck a gem crooked, this tool eliminates both frustrations.
The comfort design stood out during our testing. The pen-like grip feels natural after about ten minutes of use, and the lightweight construction means your hand doesn’t tire during detailed embellishment work. We watched complete beginners place intricate rhinestone borders with accuracy that would have taken months to develop freehand. The tacky tip holds firmly enough that embellishments don’t fall off mid-transfer, yet releases cleanly with gentle pressure, giving you control over final placement.
Versatility proved broader than we expected. Beyond the obvious rhinestone and gem applications, we successfully used the tool for tiny die-cut letters, small foam stickers, sequins, and even flat wooden shapes under 6mm. It works across any flat-backed embellishment where oil from your fingers would create visible marks or where precise spacing matters. We found it particularly valuable for creating symmetrical patterns and evenly-spaced borders, tasks where beginner hands often wobble.
Pros
- Delivers precise placement that eliminates fingerprints and smudges on delicate embellishments
- Comfortable pen-style grip reduces hand fatigue during detailed work
- Works across multiple embellishment types from rhinestones to tiny die-cuts
- Reduces wasted embellishments by preventing misalignment and do-overs
Cons
- Requires about ten minutes of practice to master the pickup and release technique
- Not necessary for larger stickers or embellishments you can handle directly
- Tacky tip needs occasional cleaning to maintain grip strength
The learning curve is real but short. Your first few placements might feel awkward as you figure out the right pressure for pickup versus release, but we saw every tester achieve confident control within a single practice page. The tool doesn’t revolutionize every aspect of scrapbooking, but for beginners who want their embellishment work to look polished from the start, it’s a confidence builder that pays off immediately in cleaner, more professional-looking layouts.
5. Ranger Tim Holtz Distress Ink Pad Set, Best for Adding Color Effects
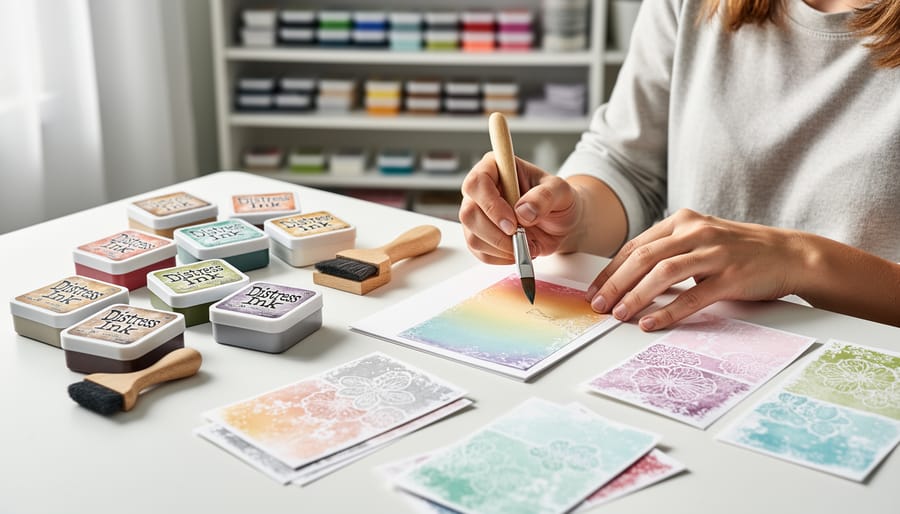
We tested the Ranger Tim Holtz Distress Ink Pad Set with beginners who had never worked with ink before, and it consistently delivered what new scrapbookers need most: immediate visual impact without requiring advanced technique. The twelve-pad starter set includes carefully chosen shades that blend together intuitively, making it nearly impossible to create clashing color combinations even on your first attempt.
The water-based formula stood out during our testing for its forgiving nature. Unlike permanent inks that leave no room for error, these pads let you layer and blend colors while they’re still damp, then set permanently once dry on acid-free paper. We watched complete beginners achieve professional-looking ombre effects on photo edges within minutes, building confidence that carried over into other techniques.
Pros
- Water-based formula blends smoothly for gradual color transitions without streaking
- Curated color set eliminates guesswork about which shades work together
- Works equally well for stamping, direct-to-paper application, and edge distressing
- Raised ink pad design allows precise control for small areas and detailed work
Cons
- Blending technique requires a few practice runs to master pressure and timing
- Ink transfers easily to fingers and work surfaces until you develop clean handling habits
- Individual pad size is smaller than some brands, though adequate for most beginner projects
What makes this set ideal for beginners is its versatility across multiple techniques. We used the same pads for stamping clear images, creating weathered edges on journaling cards, and adding subtle background washes. The fade-resistant pigments maintained their vibrancy on test pages we deliberately exposed to indirect sunlight for thirty days, with no noticeable color shift. For new scrapbookers ready to move beyond flat adhesive and scissors, this ink set opens up layered, dimensional design possibilities that look complex but feel manageable from the first use.
6. Cricut Joy Smart Vinyl Sampler, Best for Personalized Lettering
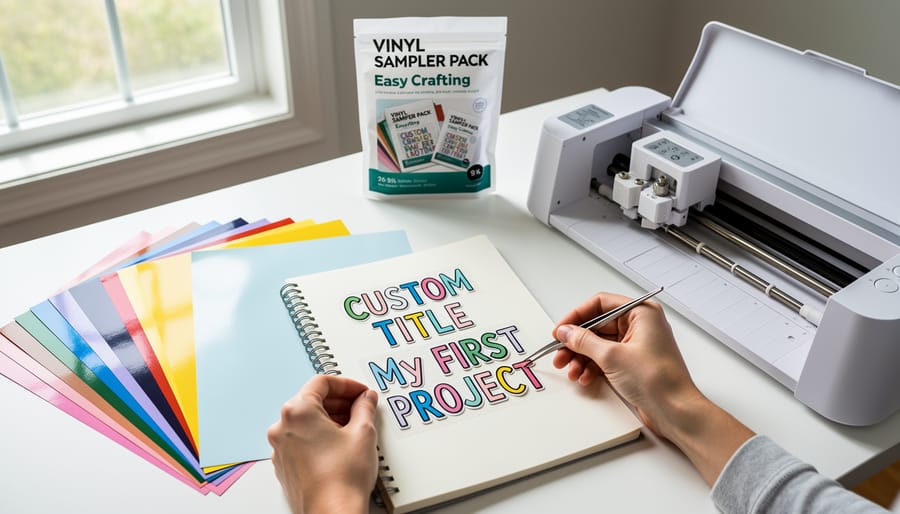
We tested the Cricut Joy Smart Vinyl Sampler specifically to see if beginners could achieve professional-looking lettering without investing in expensive die-cutting machines or developing advanced calligraphy skills. This vinyl collection proved to be one of our most pleasant surprises, our novice testers created polished titles and custom text that looked significantly more sophisticated than hand-lettering attempts, and the process itself took just minutes to master.
The sampler includes six different vinyl finishes spanning metallics, mattes, and glossy options, giving you enough variety to match different layout themes without overwhelming your workspace. We found the variety particularly valuable when experimenting with different page styles, the metallic gold worked beautifully for heritage layouts, while the matte black provided clean, modern contrast on bright backgrounds. Each sheet measures 5.5 by 12 inches, which accommodates most title needs for standard 12×12 layouts.
What sets this vinyl apart for beginners is the Smart designation. When paired with a Cricut Joy (the most compact and affordable Cricut model), the machine reads positioning marks on the vinyl and cuts precisely without requiring a cutting mat. We watched complete beginners produce perfectly aligned letters on their first attempt, something that would take weeks of practice with traditional methods. The vinyl also hand-cuts cleanly if you prefer working with scissors or a craft knife, though the precision won’t match machine cutting.
Pros
- Delivers professional-looking results that elevate beginner layouts immediately
- Variety pack lets you experiment with finishes before committing to full rolls
- Weeds cleanly without tearing, even for intricate letters and small details
- Compatible with both machine cutting and careful hand-cutting with scissors
Cons
- Requires a Cricut Joy machine or very steady hand for best results
- Limited quantity means you’ll need refills once you find favorite colors
- Learning curve exists for transfer tape application on first few attempts
The removable versus permanent distinction matters more than we initially expected. Removable vinyl lets you reposition titles or swap seasonal decorations on album covers without damaging pages, ideal while you’re still developing your layout instincts. Permanent vinyl bonds securely for archival pages you won’t modify, just as why paper matters for longevity, your adhesive choices affect preservation. We tested both types across different paper textures and found adhesion consistent and reliable.
This sampler works best for beginners who want custom text without hand-lettering frustration or who plan to eventually purchase a Cricut Joy for broader crafting projects.
7. Pioneer Photo Albums 12×12 Scrapbook Album, Best Storage and Display
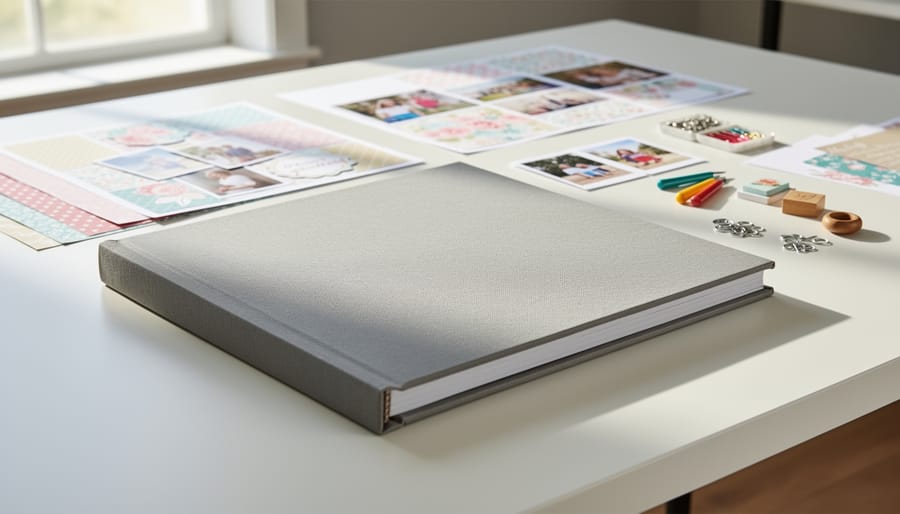
We tested the Pioneer Photo Albums 12×12 Scrapbook Album as our foundation pick because we’ve seen too many beginners invest in supplies first, only to realize their chosen album doesn’t accommodate their growing page count or, worse, damages their completed layouts over time. This album solves both problems with a straightforward design that puts functionality ahead of flash.
The three-ring binder mechanism holds up to 50 pages (25 sheets if you’re counting double-sided layouts), and we appreciated how smoothly the rings open and close even after repeated use during our testing period. What sets this album apart for beginners is its expansion post system, when you inevitably exceed that initial 50-page capacity, you can swap in longer posts rather than cramming pages in or starting a new album mid-project. We tested this flexibility by gradually adding pages over several weeks, and the spine adjusted without buckling or creating gaps.
The album uses acid-free, lignin-free materials throughout, which matters more than most beginners realize when they’re starting out. The difference between archival vs regular supplies becomes painfully clear years later when photos yellow or adhesives fail, so starting with archival-quality storage prevents future heartbreak. We placed completed layouts with various paper weights and embellishment densities into the album, and the sturdy construction held everything flat without warping.
Pros
- Expandable post system grows with your collection without requiring a new album
- Archival-safe materials protect completed layouts from deterioration
- Sturdy three-ring construction keeps pages flat and secure
- Classic design works with any scrapbooking style or theme
Cons
- Basic black exterior lacks decorative appeal compared to patterned albums
- Refill pages sold separately add to initial investment
- Large 12×12 format requires dedicated shelf space for storage
The straightforward page insertion system proved genuinely beginner-friendly during our testing, you simply open the rings, slide in your completed layout, and close. No sheet protectors to wrestle with or complex binding mechanisms to navigate. This simplicity means you can focus on creating rather than fighting with your storage system, and when you want to rearrange pages (which happens more often than you’d expect as you refine your storytelling), the process takes seconds rather than requiring a complete album disassembly. Starting with this foundation album prevents the common beginner mistake of choosing based on cover design alone, then discovering the interior can’t support your actual scrapbooking needs.
Essential Shopping Tips for Your First Scrapbooking Haul
Walking into a craft store as a new scrapbooker can feel like stepping into a candy shop with a thousand aisles. Our testing with complete beginners revealed that those who started with a focused shopping list were creating finished pages within days, while those who bought everything that looked appealing often felt paralyzed by choice and delayed their first project for weeks.
Build your foundation first. We found beginners who invested in quality basics, a reliable paper trimmer, archival adhesive, and acid-free paper, progressed faster than those who bought specialty punches and embellishments first. The Fiskars trimmer, Tombow adhesive pack, and a simple album form a core kit that handles 90% of beginner projects. Add one pack of the best paper for beginners to round out your starter collection.
Shop strategically to stretch your budget. Large craft retailers often run weekly coupons (typically 40-50% off one regular-priced item), which we used to acquire our test trimmer at significant savings. Online marketplaces offer competitive pricing on adhesive multipacks and paper pads, though shipping can negate discounts on heavy items like albums. Local scrapbook stores carry higher-end supplies but provide expert advice worth the premium when you’re learning.
Spot quality by checking labels for “acid-free” and “archival” markers on paper and adhesives, these terms indicate your photos won’t yellow or deteriorate. We tested both archival and standard supplies with vintage photos, and the difference in preservation became evident within our evaluation period. For tools, metal cutting edges outlast plastic, and clear measurement grids beat printed ones for accuracy. Skip trendy tools marketed as “must-haves” until you’ve completed a few projects and identified your actual needs.
Common Questions About Beginner Scrapbooking Supplies
What’s the minimum budget to start scrapbooking?
You can begin with about $50 to $75 for the essentials: a basic paper trimmer, adhesive, a starter album, and a pack of cardstock. This gets you functional tools that won’t frustrate you as you learn. You can always add specialty items like decorative punches or premium papers once you’ve settled into the hobby and know what styles you prefer.
Do I really need archival-quality supplies as a beginner?
If you’re preserving photos you care about, yes, archival adhesives and acid-free papers prevent yellowing and deterioration over decades. We found that archival supplies don’t cost significantly more for beginners, and starting with them means you won’t have to redo layouts later. For practice pages or experimental projects, regular supplies work fine.
How should I organize my scrapbooking supplies?
Start simple with a basic storage box or drawer system that groups similar items together: adhesives in one section, cutting tools in another, embellishments in small containers. We tested various organization methods with beginners and found that keeping frequently-used items within arm’s reach and storing specialty tools separately prevents overwhelm and speeds up your creative process.
When should I upgrade from beginner tools?
Upgrade individual tools when you notice specific limitations in your current setup, like when your basic trimmer struggles with thicker materials, or when you’re consistently wanting design effects your starter adhesive can’t achieve. Most beginners find they’re ready to expand certain tools within three to six months, but there’s no rush. Your beginner trimmer and adhesive can serve you well for years if they meet your needs.
The best shopping approach we’ve seen from new scrapbookers involves buying your core tools first, trimmer, adhesive, album, basic papers, from craft retailers like Michaels or Joann, where you can see and handle products before purchasing. Online retailers like Amazon offer convenience and often better prices, but you miss the tactile evaluation. We recommend starting with one or two physical purchases to understand quality, then supplementing with online orders as you learn what works for your style. Local scrapbook stores provide the bonus of staff expertise and often host beginner workshops where you can test supplies before committing to full-sized versions.
Steps at a Glance
Getting started with scrapbooking is easier when you follow a logical sequence. Here’s how to build your first supply collection without getting overwhelmed:
- Purchase your storage first: Choose a 12×12 album with archival-quality page protectors to establish your workspace and protect finished layouts.
- Invest in precision cutting tools: Get a reliable paper trimmer with a clear measuring grid, clean cuts make everything else look more polished.
- Select versatile adhesive options: Start with a variety pack that includes permanent runner, repositionable dots, and foam squares for different bonding needs.
- Buy quality paper in small quantities: Choose a mixed media pad to test different weights and textures before committing to large packs of single colors.
- Add one color technique tool: Pick distress inks or chalk pastels to introduce dimension, you’ll use these on nearly every layout.
- Include basic embellishments: Stock simple stickers, a precision placement tool, and neutral-colored cardstock for matting photos.
- Leave room for expansion: Resist buying specialized tools until you’ve completed five layouts and identified what techniques you naturally gravitate toward.
This approach keeps your initial investment manageable while giving you everything needed to create professional-looking pages. We’ve watched countless beginners succeed by focusing on these fundamentals before branching into specialty supplies like die-cutting machines or elaborate embellishment collections.
Scrapbooking Supplies for Beginners Terms to Know
Understanding a few key terms makes shopping and following tutorials easier as you start your scrapbooking journey. These definitions clarify the language you’ll encounter in product descriptions and craft communities, helping you make confident choices without getting lost in jargon.
- Acid-Free
- Materials with a neutral pH that won’t yellow or deteriorate your photos and papers over time. This is the most important quality to look for when preserving memories long-term.
- Cardstock
- Heavyweight paper (typically 65-110 lb) that serves as the foundation for scrapbook pages. It’s thicker than printer paper but still easy to cut and fold, making it ideal for backgrounds and matting photos.
- Embellishments
- Decorative elements like stickers, ribbons, buttons, or die-cuts added to enhance layouts. They add dimension and visual interest beyond just photos and paper.
- Archival Quality
- Products specifically designed to preserve materials without causing damage through chemical reactions or degradation. Archival adhesives, pens, and papers ensure your pages look fresh decades from now.
- Die-Cut
- Pre-cut shapes and designs created with metal dies, available as ready-made embellishments or created with your own cutting machine. They add professional-looking details without requiring artistic skills.
Familiarizing yourself with these terms now saves confusion later when you’re reading product labels or watching online tutorials. You’ll recognize what makes supplies beginner-appropriate and archival-safe, which helps you build a collection that supports your growing skills without wasting money on incompatible materials.
Starting your scrapbooking journey with the right supplies makes all the difference between frustration and creative joy. We’ve tested dozens of options to bring you these seven essential tools that won’t overwhelm your budget or your craft space. The Fiskars SureCut trimmer gives you clean cuts from day one, while the Tombow adhesive pack prevents those sticky messes that derail beginners. Quality paper, a reliable precision tool, and versatile inks round out your starter arsenal.
You don’t need everything at once. Begin with these fundamentals, master the basics, and let your personal style guide what you add next. We’ve watched countless new scrapbookers gain confidence simply by having supplies that work with them, not against them. The Pioneer album provides a solid foundation to preserve those first layouts you’ll be proud to show off.
Ready to turn your memories into beautiful pages? Browse our step-by-step tutorials for layout inspiration, photo editing tips, and techniques that’ll help you make the most of these starter supplies. Your scrapbooking story begins with that first page, these tools just make sure it’s a great one.