Discover scrapbooking paper and transform your memory-keeping projects from ordinary to extraordinary. This specialized paper differs from regular printer or construction paper through its acid-free, lignin-free composition that protects your precious photos and memorabilia from yellowing and deterioration over decades. Whether you’re just exploring scrapbooking basics or adding to your existing collection, understanding paper types helps you make smart purchasing decisions.
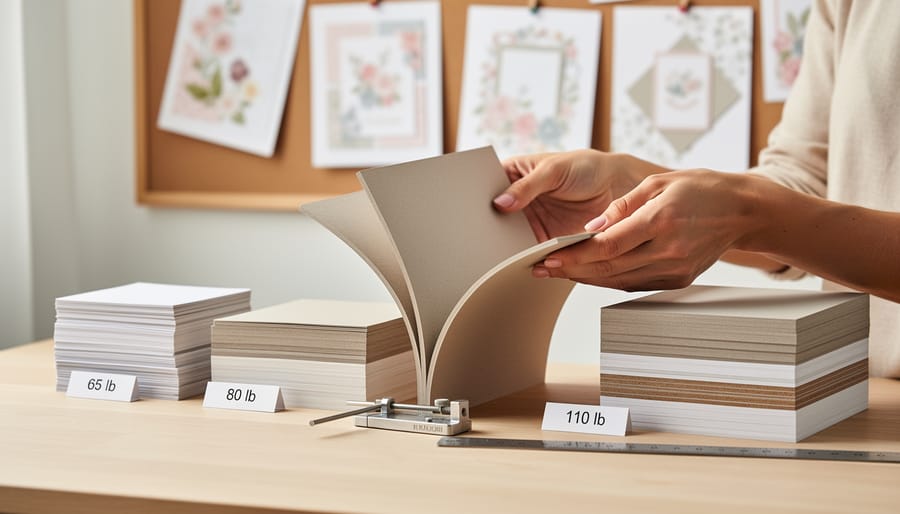
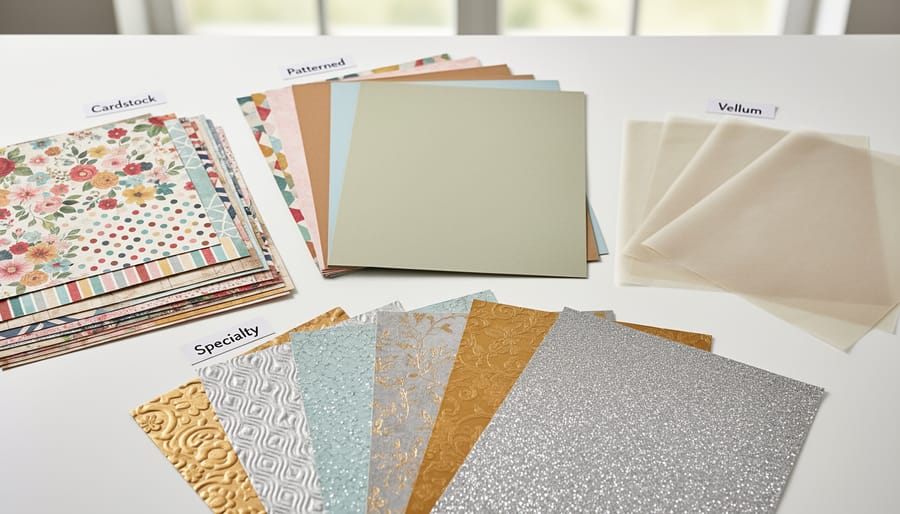
Scrapbooking paper comes in three main categories: cardstock provides sturdy 65-110 lb weight foundations for layouts, patterned paper adds decorative 20-80 lb weight designs and textures, and specialty papers include vellum, glitter, and embossed varieties for unique effects. The archival quality ensures your layouts withstand time, making them true family heirlooms rather than temporary crafts.
Choose papers based on your project needs: heavier cardstock for album pages that get frequent handling, medium-weight patterned papers for layering and embellishments, and specialty options for focal points and special touches. Most scrapbooking paper measures 12×12 inches or 8.5×11 inches, fitting standard album sizes perfectly. Understanding these fundamentals empowers you to build a versatile paper collection without overspending on unnecessary supplies.
What Makes Scrapbooking Paper Special?
You might wonder what sets scrapbooking paper apart from regular printer or construction paper. The answer lies in its carefully designed composition that’s specifically created to protect your precious memories for generations to come.
The most important feature is that quality scrapbooking paper is acid-free. Here’s why that matters: regular paper often contains acids that can yellow, become brittle, and deteriorate over time. Even worse, these acids can transfer to your photographs and memorabilia, causing them to fade, discolor, or develop unsightly brown spots. Acid-free paper has a neutral pH level, which means it won’t chemically react with your photos and keepsakes. This is essential for photo preservation, ensuring your memories stay vibrant and intact.
Another key characteristic is being lignin-free. Lignin is a natural compound found in wood pulp that gives paper its rigidity, but it breaks down over time and releases acids. By removing lignin from scrapbooking paper, manufacturers ensure long-term stability and prevent that familiar yellowing you’ve probably noticed in old newspapers.
When you see “archival quality” on scrapbooking paper, this is the gold standard. It means the paper meets strict preservation standards and is designed to last at least 100 years without significant deterioration when stored properly. This certification combines acid-free and lignin-free properties with additional quality controls.
Think of scrapbooking paper as a protective home for your memories rather than just a decorative background. While regular paper might work for temporary projects, investing in proper scrapbooking paper means your children and grandchildren will enjoy those photos and stories just as beautifully as you created them.
Understanding Paper Weight and Thickness
When you’re starting your scrapbooking journey, understanding paper weight can feel confusing, but it’s actually pretty straightforward once you know what to look for. Paper weight is measured in either GSM (grams per square meter) or pounds (lb), and it tells you how thick and sturdy your paper will be.
Cardstock is your heavyweight champion, typically ranging from 200-300 GSM or 65-110 lb. This thicker paper provides the foundation for your scrapbook pages and can support heavy embellishments like ribbons, buttons, and dimensional stickers without buckling. You’ll want cardstock for page bases, matting photos, and creating sturdy die-cut shapes.
Patterned paper sits in the lighter range at 80-120 GSM or 20-32 lb. This thinner paper is perfect for layering, creating backgrounds, and adding decorative elements without adding too much bulk to your album. Since it’s more flexible, patterned paper is also ideal for techniques like paper folding, weaving, and creating decorative banners.
Here’s a helpful tip from experienced scrapbookers: hold the paper up to the light. If you can see through it easily, it’s likely too thin for structural elements but perfect for layering. If it feels stiff and substantial, you’ve got cardstock that’ll hold up beautifully as a page base.
For most projects, keep both weights on hand. Use cardstock for the foundation and structural elements, then layer patterned paper on top for visual interest. This combination gives you both stability and style, ensuring your memory pages last for years to come.
Types of Scrapbooking Paper You’ll Encounter
Cardstock: Your Scrapbook’s Foundation
Think of cardstock as the sturdy backbone of your scrapbook pages. This heavyweight paper typically weighs between 65 to 110 pounds, making it substantially thicker and more durable than standard printer paper. That extra thickness is exactly what you need to support all those photos, embellishments, and memorabilia you’ll be adding to your layouts.
When you’re shopping for cardstock, you’ll notice the weight indicated on the package. For beginners, I recommend starting with 80-pound cardstock, which offers a perfect balance of sturdiness without being difficult to cut or fold. As you gain confidence, you might explore heavier weights for page bases or lighter weights for layering and die-cutting.
Cardstock serves multiple purposes in scrapbooking. Use it as your main page background to create a solid foundation that won’t warp or buckle under the weight of your memories. It’s also perfect for creating photo mats, cutting decorative shapes, and making sturdy tags or pockets. The best part? Cardstock comes in virtually every color imaginable, from soft pastels to vibrant brights, plus textured and patterned varieties. This versatility means you’ll always find the perfect shade to complement your photos and match your creative vision.
Patterned Paper: Adding Personality to Your Pages
Patterned paper is where the fun really begins! These decorative sheets feature printed designs ranging from florals and geometrics to seasonal themes and vintage motifs, instantly adding visual interest to your pages.
You’ll encounter two main options: single-sided papers have designs on one side only, while double-sided papers offer different coordinating patterns on each side. Double-sided options give you more flexibility and value, especially when creating creative layouts or folded elements where both sides might show.
Pattern scale matters when planning your pages. Large-scale patterns make bold statements and work beautifully as backgrounds, while small-scale patterns are perfect for layering and accents without overwhelming your photos. Medium-scale patterns offer versatile middle ground.
Expert tip: When coordinating patterned papers, stick to a cohesive color palette and vary your pattern scales. Mix a large floral with a small dot and a medium stripe for balanced, professional-looking pages. Many manufacturers create coordinated paper collections that take the guesswork out of mixing patterns.
Start with one or two patterned papers per layout as a beginner. You can always add more as you develop your style and confidence with pattern mixing.
Vellum: The Delicate Overlay
Vellum paper brings a touch of elegance to your scrapbook pages with its soft, frosted appearance. This translucent material comes in various opacity levels, from barely-there sheer to lightly frosted, allowing you to create beautiful layered effects that add depth without overwhelming your photos and embellishments.
What makes vellum special is its ability to soften and diffuse whatever sits beneath it. You can use it to create dreamy overlays on photographs, tone down busy patterned papers, or add subtle text without covering your designs completely. It’s perfect for creating windows, making delicate pockets, or wrapping embellishments for a sophisticated look.
Expert tip: When adhering vellum, use minimal adhesive in corners or along edges, as glue can show through the translucent surface. Double-sided tape, photo corners, or decorative brads work wonderfully. You can also try heat embossing or stamping directly on vellum for stunning effects. This delicate paper typically weighs between 17-40 pounds, so handle it gently to prevent creasing or tearing during your creative process.
Specialty Papers: Textured and Metallic Options
When you’re ready to add dimension and visual interest to your scrapbook pages, specialty papers become your creative playground. These papers transform ordinary layouts into stunning works of art that practically beg to be touched.
Textured papers bring tactile appeal to your projects. Linen-textured papers create an elegant, fabric-like appearance perfect for wedding or heritage layouts. Canvas-textured options add an artistic, rustic quality that works beautifully with nature or outdoor themes. Woodgrain patterns bring warmth and organic charm, ideal for camping memories or cabin retreats. These textured surfaces catch light differently than smooth papers, creating subtle shadows that add depth to your pages.
Metallic and foil papers deliver instant glamour and sophistication. Gold and silver metallics work wonderfully for celebrations, holidays, and milestone events. Rose gold has become incredibly popular for modern, feminine layouts. Foil-accented papers feature shiny designs on matte backgrounds, offering the best of both worlds.
Here’s an expert tip: use specialty papers strategically as accents rather than full backgrounds. They can overpower your photos if used excessively. Try cutting metallic papers into banners, frames, or die-cut shapes. Layer textured papers behind photos for subtle dimension. Remember that these papers photograph beautifully, making your finished albums look professionally crafted. Keep specialty papers flat during storage to prevent the foil from creasing or flaking.
Photo-Safe Paper Versus Regular Craft Paper
Here’s the key difference you need to know: photo-safe scrapbooking paper is specifically designed to protect your precious memories, while regular craft paper can actually damage your photos over time.
Regular craft paper often contains acids and lignin—chemicals that cause yellowing, brittleness, and deterioration. When these papers come into contact with your photographs, they can transfer these harmful substances, leading to faded images and crumbling edges. Not exactly what you want for memories you’re trying to preserve!
Photo-safe scrapbooking paper, on the other hand, is acid-free and lignin-free. This means it won’t break down or harm your photos, even after decades. Think of it as insurance for your memories. Most quality scrapbooking paper will clearly state “acid-free” and “photo-safe” on the packaging.
Expert tip: If you’re creating decorative projects without photos, regular craft paper works perfectly fine and costs less. But for any page containing photographs, always invest in proper archival-quality scrapbooking paper. Your future self will thank you when those memories remain vibrant and intact!
How to Choose the Right Paper for Your Project
Choosing the right scrapbooking paper doesn’t have to feel overwhelming, even if you’re just starting out. Let me walk you through a simple framework that will help you make confident decisions every time you shop.
Start by considering your project type. Are you creating a wedding album meant to last generations, or a fun birthday card for immediate enjoyment? For heritage albums and important memories, invest in acid-free, lignin-free archival paper that won’t yellow or deteriorate. For everyday crafts and temporary projects, standard cardstock works beautifully and saves your budget for where it matters most.
Next, think about your theme and aesthetic. If you’re documenting a beach vacation, look for papers with ocean-inspired colors and patterns. Planning a baby album? Soft pastels and gentle designs create that sweet atmosphere. Don’t be afraid to mix patterns, but keep a cohesive color palette to tie everything together.
Here’s my practical decision-making process: First, choose one or two patterned papers that capture your theme. Then, select coordinating solid colors for backgrounds and layering. Finally, grab one specialty paper, like vellum or metallic, for accent elements. This three-step approach prevents impulse buying while ensuring variety.
Budget matters too, and that’s completely okay. You don’t need the most expensive papers to create stunning pages. Many craft stores offer house brands with excellent quality at lower prices. Buy individual sheets when testing new styles, then invest in paper pads once you find favorites.
Remember, the best paper is the one you’ll actually use. Start with basic cardstock in neutral colors, then gradually expand your collection as you discover your personal style. Trust your instincts, have fun experimenting, and don’t stress about making the “perfect” choice. Your creativity matters far more than premium materials.
Storing Your Scrapbooking Paper Properly
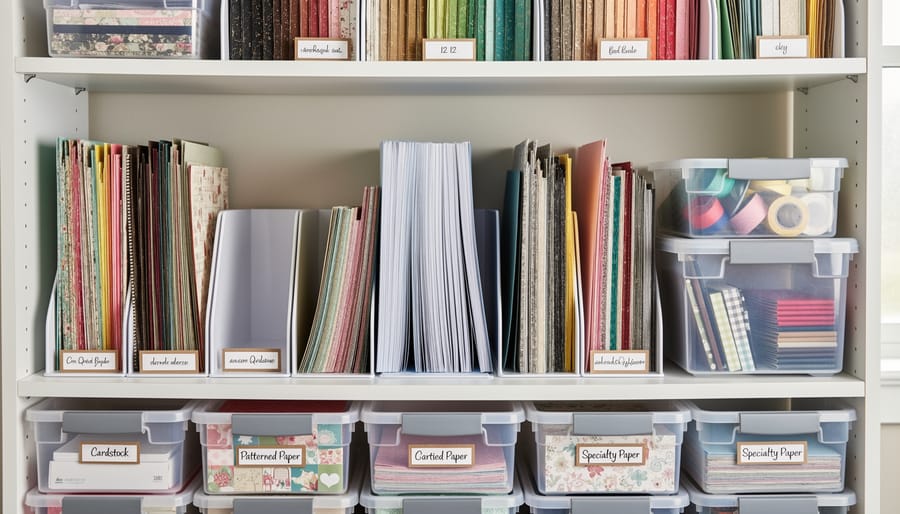
Keeping your scrapbooking paper collection in pristine condition doesn’t have to be complicated, but it does require a bit of attention to detail. The key is protecting your investment from three main enemies: moisture, direct sunlight, and physical damage.
Store your paper flat in a cool, dry place away from windows and damp areas like basements. Acid-free page protectors or plastic sleeves work wonderfully for individual sheets, while vertical file boxes or horizontal paper storage containers keep larger collections organized and accessible. If you’re serious about organizing your craft space, consider investing in dedicated paper storage systems that allow you to sort by color, pattern, or project.
Here’s an expert tip: avoid storing paper in direct contact with wood shelving or cardboard boxes, as these materials can transfer acids over time and compromise your paper’s archival quality. Instead, use metal filing cabinets, plastic containers, or specialty craft storage units.
Keep specialty papers like vellum and cardstock separate from each other to prevent texture transfer, and always handle your paper with clean, dry hands. With proper storage, your scrapbooking paper will stay vibrant and ready for your creative projects for years to come.
Choosing the right scrapbooking paper truly makes all the difference in how your memories stand the test of time. By investing in quality, acid-free, and lignin-free papers, you’re not just creating beautiful pages—you’re protecting your precious photographs and mementos for generations to come. Remember, this isn’t just paper; it’s the foundation of your family’s story.
Don’t be afraid to experiment with different types and textures as you grow in your scrapbooking journey. Mix cardstock with patterned papers, try specialty finishes, and discover what speaks to your creative vision. Every scrapbooker has their favorites, and you’ll find yours through hands-on experience.
Here’s my expert tip: start with a small collection of versatile papers in your favorite colors, then expand as you develop your style. Quality always trumps quantity when it comes to preserving memories that matter.
So grab that acid-free paper, gather your photos, and start creating something beautiful today. Your future self will thank you for the memories you’re about to preserve.