
Learning woodworking from books requires a specific three-phase approach: preparation (gathering tools and materials mentioned in your chosen text), active practice (working through projects with deliberate technique refinement), and skill verification (testing your work against quality benchmarks). Most readers treat woodworking books like novels, reading cover to cover and hoping skills will somehow stick. That passive approach fails because woodworking is a physical craft that demands hands-on repetition with constant feedback loops.
The gap between reading about dovetail joints and actually cutting clean ones is massive. Books like “The Penland Book of Woodworking” and “Woodworking Techniques / Projects for the Beginner” provide excellent instruction, but their value depends entirely on how you extract and apply their content. You need a system that transforms written guidance into muscle memory.
This guide walks you through that complete learning cycle. You’ll discover how to decode technical illustrations, set up focused practice sessions that isolate individual skills, and build a verification routine that reveals exactly where your technique needs work. Whether you’re holding “The Home Workshop” or “Woodworker’s Pocket Reference, Second Edition,” the same active learning framework applies. The books contain the knowledge, but your practice system determines whether that knowledge becomes actual skill.
Think of this as treating woodworking books the way musicians use sheet music: not as something to merely read and admire, but as a blueprint for countless hours of focused, deliberate practice.
What You’ll Need to Learn Effectively from Woodworking Books
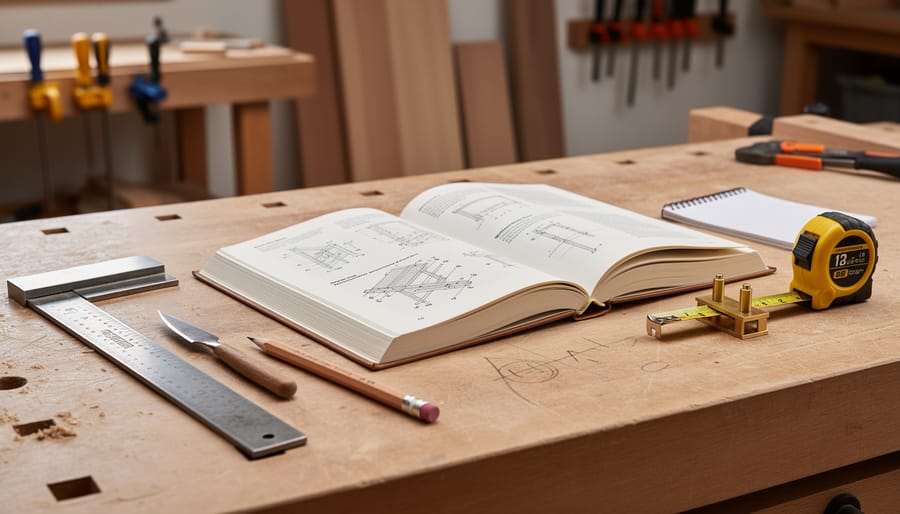
Learning from woodworking books requires more than just reading. You need a proper setup that bridges the gap between printed instructions and actual woodworking practice. Think of this less like collecting beginner supplies for passive study and more like assembling an active learning workshop where books become hands-on tools.
Your core learning materials should include:
- A comprehensive reference guide like Woodworker’s Pocket Reference, Second Edition for quick lookups of measurements, wood properties, and standard techniques
- At least one technique-focused manual such as The Penland Book of Woodworking that breaks down fundamental skills with detailed photos
- A project book like The Home Workshop (Woodsmith Custom Woodworking…) that combines instruction with actual builds
- A dedicated woodworking notebook or journal, similar to how crafters organize different types of paper but focused on sketches, measurements, and technique notes
- Practice lumber in various softwoods (pine, poplar) for trying techniques without expensive mistakes
- A basic hand tool set including chisels, hand saw, marking tools, and squares referenced in your books
- A dedicated workspace where you can leave a book open while working, even if it’s just a corner of a garage
- A simple progress tracking system, whether a spreadsheet or physical checklist of techniques you’ve practiced
The mix of reference guides, technique manuals, and project books serves different learning purposes. Reference books answer quick questions mid-project. Technique manuals teach individual skills through repetition. Project books show how skills combine into finished work. You’ll return to each type at different stages of learning the same skill.
Your notebook becomes your personalized reference, translating book instructions into your own measurements, workshop conditions, and wood choices. Annotate directly in books you own, but transfer key insights and modifications to your notebook where you can cross-reference techniques from multiple sources. Publishers like Fox Chapel Publishing often structure their books to work together as a progressive system, which makes building a compatible library easier.
Practice lumber matters more than tool variety at this stage. You’ll burn through cheap pine testing the same cut or joint repeatedly until your hands understand what the book’s photos show. Dedicate specific boards to specific techniques so you can see your progression from first attempt to competent execution.
Safety Considerations When Learning from Books
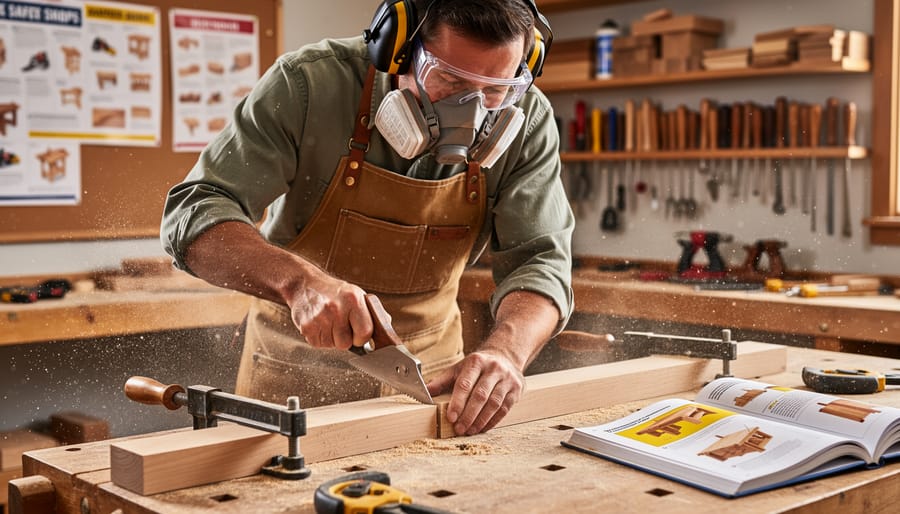
Books offer detailed instructions and clear diagrams, but they can’t watch over your shoulder or stop you mid-cut when something goes wrong. Before you attempt any technique from a woodworking manual, read the entire relevant chapter, not just the steps for your specific project. Authors often bury critical safety warnings in introductory paragraphs or tool overview sections that eager beginners skip.
Photos and illustrations capture finished cuts and proper hand positions, but they can’t show you the split-second moment when a chisel slips or a board kicks back. What looks straightforward on the page becomes physically demanding and sometimes dangerous when you’re holding the tool. The gap between seeing a technique and safely executing it is where accidents happen.
Complex operations like using a table saw for dadoes, operating a router for edge profiles, or cutting mortise-and-tenon joints require spatial awareness and tactile feedback that books simply can’t teach. If a technique involves power tools you’ve never used, spring-loaded mechanisms, or operations where your hands come within six inches of a blade, seek in-person guidance from an experienced woodworker or take a community workshop class. Some skills need human demonstration and correction.
Your shop needs proper safety equipment regardless of what any book recommends. That means eye protection for every operation, push sticks and featherboards for table saw work, sharp tools maintained regularly, and adequate lighting so you can see exactly where your hands are positioned. Keep a first aid kit within reach and never work when you’re tired or distracted.
When you start applying techniques from books to actual woodworking project ideas treat your first attempts as pure practice runs on scrap lumber. This lets you discover how the wood responds to your tools, where your technique needs adjustment, and which safety concerns the book might have understated. Only after you’ve executed a cut or joint successfully multiple times on practice pieces should you work on your final project wood.
Step-by-Step: How to Study and Practice from Woodworking Books
Phase 1: Active Reading and Preparation
Start by reading with a pencil in hand, not just your eyes on the page. When you open a book like Woodworking Techniques / Projects for the Beginner, treat each technique section as a mini-lesson you’ll return to repeatedly. Underline the critical steps, circle measurements that matter, and write questions in the margins when something isn’t clear. If a book explains how to cut a dado joint, mark the blade depth, the fence distance, and any safety warnings directly on the page where you’ll see them when you come back to practice.
Create a dedicated notebook that becomes your workshop companion. As you read, extract the core techniques and write them in your own words with simplified diagrams. When a book mentions a specific jig or setup, sketch it out with the actual dimensions you’ll need for your tools. This isn’t busywork; rewriting information forces you to process it rather than just recognize it. Your notebook becomes a quick-reference guide built for your hands and your shop, not a generic instruction manual.
Pay attention to how beginner books structure their content. Woodworking Techniques / Projects for the Beginner and similar titles typically start with tool basics before moving to joinery, then simple projects. This sequence reveals prerequisite skills. If a project requires mortise-and-tenon joints, flip back to the joinery chapter and master that technique on scrap wood before attempting the project. Mark these dependencies in your notebook so you know what to practice first.
Don’t skip the introductory chapters that explain wood grain, moisture content, and tool maintenance. These sections seem boring until you ruin a board because you cut against the grain or your chisel is too dull to control properly.
Phase 2: Deliberate Practice Sessions

Once you’ve absorbed the book’s instructions, it’s time to put them into action through structured practice sessions. This is where real learning happens, not from simply reading, but from repeating techniques until your hands understand them as well as your mind does.
Start by clearing a dedicated practice window in your workshop. Gather scrap lumber specifically for skill-building exercises, not projects. Pine or poplar offcuts work well because they’re forgiving and cheap. Set up your workspace with the book open to the technique you’re practicing, propped where you can see diagrams without flipping pages mid-cut or mid-stroke.
Pick one specific skill to practice in each session. If you’re learning mortise and chisel work, spend an entire session on just that, not attempting a full project, just cutting practice mortises in scrap. Focus on chisel grip, mallet strikes, and the paring technique shown in your reference. Books like “Woodworking Techniques / Projects for the Beginner” break down these foundational movements into discrete steps, which makes isolation easier.
Work through the technique multiple times, then compare your results directly to the photos in your book. Are your saw kerfs as clean? Is your chisel work as controlled? This comparison isn’t about discouragement, it’s about identifying exactly what needs adjustment. Your fourth attempt will be noticeably better than your first.
Keep a practice log in a notebook. Jot down what you practiced, how many repetitions you completed, what felt awkward, and what clicked. Note the date and the book section you referenced. Over weeks, this log becomes proof of progress that’s easy to miss day-to-day.
Repeat techniques across multiple sessions before moving on. Muscle memory develops through consistent repetition, not single attempts. When a technique starts feeling natural rather than mentally taxing, you’ve built real competence, and that’s when you’re ready to apply it to an actual project.
Phase 3: Project-Based Application
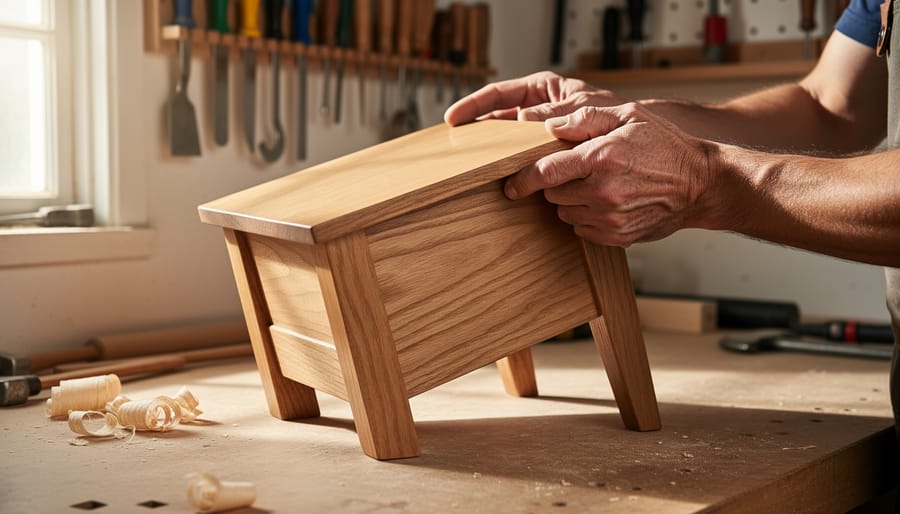
Once you’ve practiced individual techniques on scrap wood and built confidence in your foundational skills, you’re ready to tackle complete projects using your woodworking books as guides. The transition from isolated technique practice to finished pieces requires strategic project selection and systematic skill integration.
Start with projects that combine two or three techniques you’ve already practiced separately. A simple shelf project, for instance, might require only measuring and cutting, basic joinery, and sanding, all skills you’ve rehearsed independently. Books like The Home Workshop (Woodsmith Custom Woodworking…) excel at presenting structured beginner projects that clearly identify required techniques before you begin. Read through the entire project plan first, highlighting each skill component, then assess honestly whether you’ve practiced each one enough to execute it confidently.
Break every project into discrete skill phases rather than rushing straight through. If a cutting board project involves ripping lumber, edge jointing, gluing, and finishing, treat each as its own mini-session. Complete one phase, evaluate your work against the book’s photos and specifications, then proceed only when that step meets acceptable standards. This deliberate pacing prevents compounding errors and builds the quality-assessment mindset that separates careful craftspeople from frustrated beginners.
You’ll encounter moments when a book’s plan doesn’t match your available materials, tools, or skill level. Knowing when to modify plans is crucial. Simplify joinery methods if you haven’t mastered the book’s suggested technique, a pocket screw joint works where a mortise-and-tenon might fail in beginner hands. Adjust dimensions to fit your lumber without changing proportions. However, never modify structural elements or safety-critical components without understanding the engineering principles involved.
Build project complexity gradually across multiple builds. Complete three simple boxes before attempting a drawer with dovetails. Master flat panels before tackling frame-and-panel doors. This incremental approach mirrors how craft skills develop across disciplines, much like using adhesive techniques progress from basic application to precision layering in paper crafts, woodworking joinery advances from simple to complex through repeated practice with increasing challenges.
Creating Your Personal Reference System
A scattered collection of woodworking books loses its value if you can’t quickly find the technique you need. Build a simple reference system that makes your growing library actually useful.
Start with a master index in a dedicated notebook or digital document. List each book you own across the top of a page, then down the left side write the techniques and topics you reference most: dovetail joints, mortise and tenon, finishing methods, specific tool operations. When you discover a particularly clear explanation or diagram in any book, note the page number in the corresponding grid cell. This takes ten minutes per book but saves hours of frustrated flipping later.
Create physical quick-reference cards for operations you perform frequently. Use index cards or cut paper to fit your tool storage areas. Write the essential steps for sharpening chisels, setting up your table saw fence, or mixing finishes, noting which book and page each procedure comes from. Keep these cards where you’ll actually see them during work sessions.
Photograph your completed projects and practice pieces, storing images alongside notes about which book guided that work and what you learned. When “The Home Workshop” or “Woodworking Techniques / Projects for the Beginner” shows a finished joint, you’ll have your own version for direct comparison, helping you spot where your technique needs adjustment.
Cross-reference between books by marking when multiple authors address the same technique differently. Write “see also: Pocket Reference p.47” in the margin of “The Penland Book of Woodworking” when you find alternative approaches. Publishers like Fox Chapel Publishing often provide online resources, templates, and video supplements that extend what’s in print, so check their websites for materials that complement your books.
How to Know You’re Making Real Progress
Measuring your progress in woodworking isn’t about counting projects. It’s about recognizing when techniques shift from conscious effort to muscle memory, and when you start catching mistakes before they happen rather than discovering them afterward.
The clearest sign you’re advancing is consistency. When you can execute a dovetail joint three times in a row with similar results, or plane a board flat without constantly checking the technique diagrams in your reference books, you’ve moved beyond memorization into genuine skill. Your hands know what to do. You’ll find yourself reaching for books like Woodworker’s Pocket Reference less for basic instructions and more for specific measurements or material properties.
Watch how your relationship with your books changes. Early on, you need step-by-step guidance for everything. As you progress, you’ll flip to a book only to confirm a detail or check a dimension. When you find yourself questioning techniques in beginner books or mentally noting that you’d approach something differently than the author suggests, you’ve developed your own understanding. That critical eye means you’re ready for more advanced resources.
Project completion tells a significant story. Your first projects likely took twice as long as estimated, with multiple do-overs. As skills solidify, you’ll finish projects closer to the timeline suggested in books like The Home Workshop, and your need to redo steps decreases. More importantly, you’ll complete projects that actually match the photos in the book, not just vaguely resemble them.
- You execute techniques consistently across multiple attempts without referring to instructions
- You reach for reference books only for specific details rather than step-by-step guidance
- You complete projects successfully with results matching your intentions
- You recognize potential problems and quality issues before making cuts or joins
- You can explain techniques to others or adapt them to new situations
Perhaps the strongest indicator is anticipation. You start seeing three steps ahead. Before making a cut, you visualize the joint it will create. You notice when grain direction will cause problems or when a measurement doesn’t quite make sense, even if it’s printed correctly in the book.
When you reach this point with beginner and intermediate books, it’s time to seek specialized resources or in-person instruction. Books excel at teaching fundamentals and standard techniques, but advancing beyond intermediate skills often requires feedback on subtle aspects of form and technique that photos can’t capture. If you’re consistently working through books like The Penland Book of Woodworking without struggle, consider workshop classes or mentorship to refine your approach and tackle advanced joinery or finishing techniques.
Next Steps: Building Your Woodworking Library and Skills
Once you’ve built a solid foundation through deliberate practice with your first few books, it’s time to expand both your library and your capabilities. Think of this as leveling up your entire learning system, not just adding more titles to your shelf.
Start by identifying which area of woodworking excites you most. If you gravitated toward the joinery sections in your beginner books, seek out specialized resources on mortise and tenon work or dovetails. If you loved the furniture projects in The Home Workshop, look for intermediate furniture construction guides. Carving, turning, timber framing, each discipline has dedicated books that go deeper than general woodworking texts can.
Here’s what makes intermediate learning different: you’ll now revisit those beginner books with experienced eyes and notice details you missed the first time. That basic chisel technique you practiced months ago suddenly connects to advanced dovetail cutting. The Penland Book of Woodworking reveals new layers when you understand the context behind each technique.
Combine your book learning with complementary resources. Watch videos to see techniques in motion, then return to your books for the precise measurements and detail that video often glosses over. Consider a weekend workshop for hands-on feedback, then use your books to reinforce what you learned. Books provide the depth; other resources add perspective.
As you grow, contribute your own knowledge. Share your annotated reference system with fellow woodworkers, post progress photos, or teach a beginner the technique you just mastered. This cycle of learning and teaching enriches the entire craft community, exactly what Time To Scrap celebrates across all hands-on creative disciplines.
Common Questions About Learning from Woodworking Books
Can you really learn woodworking from books alone?
You can develop solid fundamental skills from books, but complete self-teaching has limits. Books excel at teaching hand tool techniques, joinery principles, and project planning, but they can’t watch your stance at the tablesaw or correct unsafe habits in real time. Most successful woodworkers combine book learning with occasional workshops or mentorship for complex power tool operations and safety verification.
How many books do beginners need to start?
Start with two books: one comprehensive technique manual like Woodworker’s Pocket Reference, Second Edition and one project-focused guide such as Woodworking Techniques / Projects for the Beginner. This combination gives you both the reference foundation and hands-on application. You can build your library as you identify gaps in your knowledge or develop interest in specialized areas like furniture or carving.
Should you read a woodworking book cover-to-cover or jump straight to projects?
Read the safety and tool sections completely first, then jump to projects that match your current skill level. Use projects as your teacher and refer back to technique chapters as needed. This active approach keeps you engaged while ensuring you understand critical safety information before touching tools.
How do you choose between conflicting techniques in different books?
Try both methods on scrap wood and see which produces better results for your skill level and available tools. Books like The Penland Book of Woodworking often explain why different craftspeople prefer different approaches. What matters is consistent, quality results in your own shop, not finding the single “correct” technique.
When should you seek in-person instruction instead of relying on books?
Get hands-on guidance before attempting your first cuts on a tablesaw, jointer, or planer. Seek in-person help when you’ve practiced a technique repeatedly but your results don’t match the book’s standards, or when safety procedures feel unclear. Books teach principles brilliantly but can’t spot the small setup errors that lead to dangerous kickback or poor results.
How long does it take to master techniques from books?
Expect to spend 15-20 focused practice sessions to achieve basic competence with fundamental techniques like sawing, chiseling, or drilling. Mastery develops over months of project work where you apply techniques repeatedly in different contexts. Books accelerate learning by providing clear instruction, but your hands need time and repetition to internalize the skills.
These questions reflect what most beginners worry about when starting their book-based woodworking education. The reality is that books are powerful learning tools when you approach them as guides for deliberate practice rather than passive reading. Your progress depends less on which books you own and more on how consistently you translate their instructions into hands-on work sessions. Set realistic expectations, practice techniques on scrap wood until they feel natural, and don’t hesitate to revisit beginner resources like The Home Workshop as you build more complex projects. Every experienced woodworker returns to foundational books with fresh eyes as their skills develop.
Woodworking books aren’t meant to sit on your shelf looking impressive. They’re practice partners, technique coaches, and reference guides rolled into one. The real transformation happens when you stop reading and start doing. Pick one book from your collection right now. Choose a single technique that interests you. Then grab some scrap wood and spend 30 minutes trying it. That’s how mastery begins.
Consistent, deliberate practice guided by quality books builds genuine woodworking skills over time. You’ll make mistakes. Your first dovetails will look rough, and your initial chisel work won’t match the photos. That’s exactly the point. Each practice session teaches you something the book can’t show in words or pictures. You develop feel, timing, and judgment through your hands.
This hands-on approach to learning reflects what we believe at Time To Scrap: real craft skills come from doing, whether you’re working with wood, paper, fabric, or any other material. Books provide the roadmap, but you create the journey. So close this article, open your woodworking book, and make something today. Your skills are waiting in those pages, ready to come alive through practice.