A festive crochet bag is one of the most satisfying Christmas projects you can make, and most beginners can finish a simple one in a weekend with basic stitches, a single skein or two of worsted-weight yarn, and a hook that matches it. The method is straightforward: pick a sturdy stitch, work a flat base, build the sides in rounds, then add straps and a festive touch like a pom-pom, a stripe of red and green, or a cozy cable-look texture.
Why a bag? Because it’s useful the moment it’s done. A tote can carry wrapped gifts to a family dinner, a small drawstring pouch can hold stocking stuffers, and a sturdy market-style bag becomes a gift all on its own. Plus, bags are forgiving. A slightly uneven stitch disappears into the fabric, so you can relax and enjoy the process.
If you want a bigger menu of options beyond the holiday theme, browse these crochet patterns for bags for extra inspiration. Below, I’ll walk you through how to choose the right festive idea, what to gather, and a step-by-step tutorial you can adapt to almost any bag pattern, so you can finish with confidence.
Choosing the Right Christmas Bag Pattern for Your Skill Level
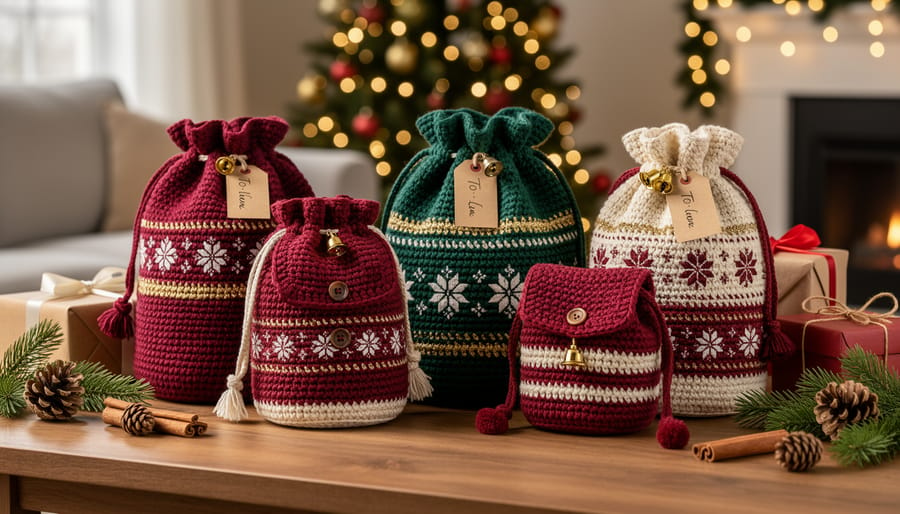
Festive Bag Ideas to Crochet This Season
Christmas gives you plenty of bag shapes to play with, and each one teaches a slightly different skill. Here are the styles I’d start with, so you can pick whichever matches your mood and your patience level:
- Drawstring gift bags: beginner-friendly, worked in simple rounds, and perfect for wrapping small presents.
- Mini treat pouches: a quick beginner win that holds sweets, tea bags, or a little ornament.
- Candy cane stripe totes: confident-beginner level, since you’ll be swapping red and white yarn as you go.
- Wine bottle sleeves with bags: an easy tube shape, great for hostess gifts with a handle added on.
- Reusable wrapping bags: roomy and forgiving, ideal for bulky gifts you’d normally struggle to wrap.
- Christmas market totes: a step up, because sturdy handles and a firm base take a little more care.
Don’t worry if the stripes or handles sound like a stretch right now. You can always begin with a plain drawstring bag and work your way up as your confidence grows.
Colour is where the festive feeling really comes in. Classic red, white, and evergreen never fails, but deep navy with silver, cream with gold, or soft blush with sage feels lovely too. For simple motifs, try a single row of tiny hearts, a contrast-colour band at the top, or a little crocheted star sewn on afterwards. Keep it small and neat. One sweet detail looks far more polished than five crowded together, and it keeps the project relaxed enough to finish in a cosy evening.
Matching a Pattern to Your Skill Level and Time
Not sure which festive bag to start with? Match the pattern to where your hooks and hours are right now.
Beginner: If you’re comfortable with single crochet and working in the round, you’re ready for a drawstring gift bag or a simple rectangle pouch. These need only one stitch and very little shaping, so you can settle into a rhythm. Plan on an evening or two, and don’t be surprised if the second bag goes faster than the first.
Confident beginner: Once colour changes feel manageable, try candy cane stripes, a simple two-colour pattern, or a bag with a fabric lining. The stitches are still basic, but you’ll be juggling yarn ends and keeping edges tidy. Give yourself a relaxed weekend, especially if you’re sewing in a lining.
Intermediate: Ready for more of a challenge? Look for texture stitches, appliqué stars or holly, and structured bottoms that help a tote stand up on its own. These details add real polish, but they also add time. Set aside a full weekend, or spread the project over several evenings.
Be honest about your deadline, too. A quick bag you finish beats an ambitious one that’s still unfinished on Christmas Eve.
Tools and Materials for Crocheting Christmas Bags
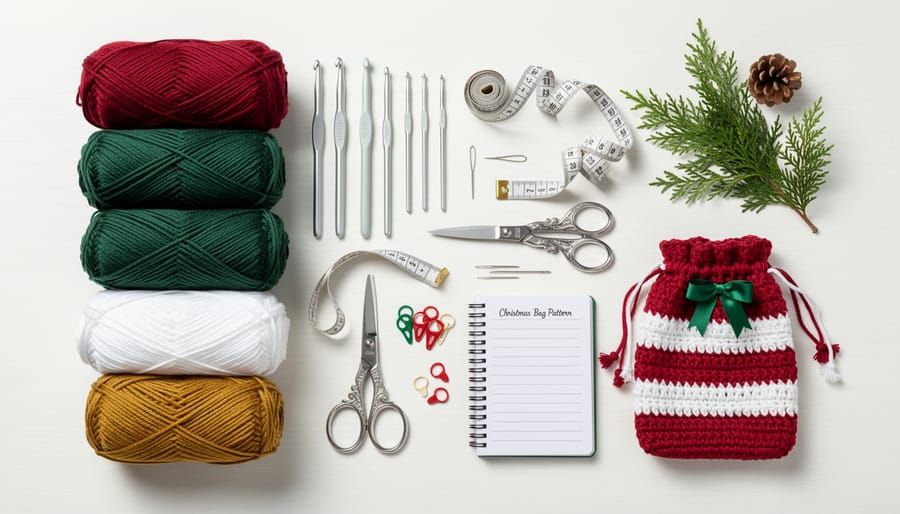
Before you pick up a hook, it helps to gather everything in one spot. Nothing kills festive momentum like hunting for a tapestry needle halfway through a round.
Here’s a simple checklist to work from:
- Cotton yarn for totes, because it’s sturdy and holds its shape under the weight of gifts.
- Acrylic yarn for soft gift bags, since it’s light, forgiving, and comes in plenty of holiday colours.
- Speckled or metallic accent yarn for stripes and trims, which adds sparkle without needing a whole skein.
- A crochet hook in the size your yarn label suggests, or one size smaller for a firmer bag.
- Stitch markers to mark the start of each round so you never lose your place.
- A tapestry needle for weaving in ends and sewing on trims neatly.
- Sharp scissors for clean cuts that won’t fray your yarn.
- Drawstring cord or ribbon to cinch the top closed.
- Optional lining fabric for a structured, gift-ready finish.
- Buttons or festive embellishments for a little extra charm.
Now for a couple of expert tips. For bags, choose a yarn with a bit of body. Floppy, loosely spun yarn tends to sag and stretch once you add a gift, while a tightly plied cotton or a sturdy worsted acrylic keeps its structure. A quick test: drape a strand over your finger and see if it feels springy rather than limp.
Buying enough yarn matters too. Check the label for a dye-lot number, and pick up all your skeins of one colour at the same time, ideally with the same lot number. Colours can shift slightly between batches, and that difference shows up as an obvious stripe in your finished bag. When in doubt, buy one extra skein. You can always use leftovers for stripes, tags, or small appliqué later.
Safety Warnings and Common Pitfalls to Avoid
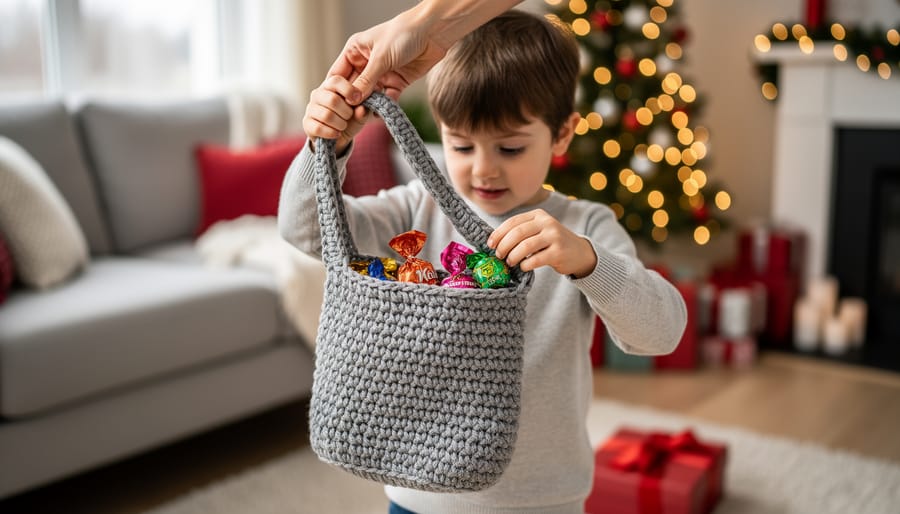
Before you start stitching, a few safety and quality checks will save you heartache later. The biggest one is who the bag is for. If a little one will get their hands on it, skip buttons, beads, and anything glued or loosely sewn on. Crocheted appliqués worked in the same yarn as the bag are a much safer way to add sparkle.
Metallic and glitter yarns look gorgeous but deserve a quick test. Rub a swatch against your wrist and give it a gentle tug. If it feels scratchy or leaves sparkly fluff behind, use it as a thin accent stripe rather than the whole bag, especially for a gift that will touch skin or clothing.
Keep lit candles, fairy lights that run warm, and other heat sources well away from your yarn and finished projects. Many yarns, acrylic especially, don’t react kindly to heat.
It’s also worth knowing when to pause and rethink:
– Hand or wrist pain: stop, stretch, and rest. A project is never worth an injury.
– Uneven tension that warps the bag: pull back a few rounds, try a different hook size, and carry on.
– Yarn running short: don’t push your luck. Switch to a contrasting colour for the top band or drawstring, which looks intentional and festive.
How to Crochet a Simple Christmas Drawstring Gift Bag, Step by Step
Expert Tips for Neat, Sturdy Bags
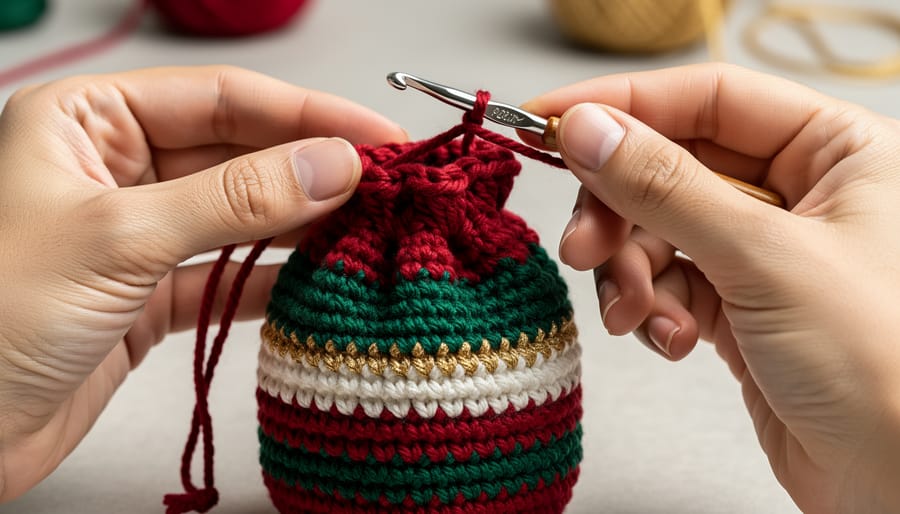
A neat bag starts with habits you build before the first round is even done. Here are the tips I lean on most, plus a quick run-through you can follow from base to finish.
Keep your tension steady by relaxing your grip and letting the yarn glide through your fingers. Place a stitch marker in the first stitch of every round so you never lose your place. If the fabric feels floppy, drop down one hook size. Tighter stitches make a firmer bag that holds its shape around a gift.
Here’s the order I work in:
- Start the base with a magic ring or a chain joined into a circle, and work enough stitches to lay flat without cupping or ruffling.
- Work a second layer of stitches over the base if you’re carrying something heavy, which reinforces the bottom.
- Build the sides in continuous rounds, moving your stitch marker up each time.
- Switch to a festive stripe or colour when the bag reaches the height you want.
- Make an eyelet row by chaining and skipping stitches evenly around.
- Finish the top edge with a plain round to keep it tidy.
- Crochet a long chain for the drawstring and thread it through the eyelets.
- Weave in every end with your tapestry needle.
Finally, block your finished bag lightly. A gentle spritz of water and a little shaping while it dries evens out the stitches and gives you a clean, professional shape.
Making Your Bag Look Extra Festive
Once your bag holds its shape, the fun part begins. A few small touches can turn a plain bag into something that looks right under the tree.
Start with colour-change stripes, since they’re the easiest trick. Swap to a new colour at the start of a round, and try red and white for a candy cane feel, or green and cream for something calmer. Two or three stripes is plenty.
Next, try appliqué, which just means a small separate piece, like a star, tree or holly leaf, that you crochet on its own and sew onto the bag. Flat motifs are quick to make and a great way to use up scraps.
Pom-poms and tassels add easy texture. Tie one to the end of your drawstring, or pop a few along the top edge.
A contrasting trim, such as a round of single crochet in a bright shade around the opening, gives a clean, finished look.
Finally, add a tag. A tiny crocheted label or a paper tag tied on with ribbon makes the bag feel like part of the gift.
Checking Your Finished Bag and What to Make Next
Before you wrap anything inside, give your finished bag a quick once-over. Turn it inside out and look for loose ends, then tug gently on each woven-in tail to make sure it stays put. Run your fingers along the seams and base; they should feel firm, with no gaps or thin patches. Pull the drawstring back and forth to check that it glides smoothly through the eyelets without snagging. Finally, pop in a gift of typical weight and see whether the bag holds its shape or sags and stretches. If it stretches, a firmer hook size or a reinforced base will fix it next time.
Once you’re happy with your first bag, try making a matching set in different sizes, a lined Christmas tote, or a reusable wine bag. If you’d like more inspiration, our collection of bag crochet patterns is a great place to grow your skills. You might also enjoy practicing your stitches on some crochet doily patterns or browsing our Christmas doilies tips to add more festive pieces to your holiday table.
Frequently Asked Questions About Christmas Crochet Bags
How much yarn does a small gift bag need?
A small drawstring bag usually takes a single ball or skein of medium-weight yarn, but it depends on the size you’re after. If you’re unsure, buy one extra ball so you don’t run short mid-project.
Is cotton or acrylic better for a Christmas bag?
Cotton gives a sturdier bag that holds its shape, which is great for totes and heavier gifts. Acrylic is soft, budget-friendly and comes in lots of festive colours, so it suits lighter gift bags nicely.
How do I wash a crocheted bag?
Check the yarn label first, then hand wash gently in cool water and reshape it while damp. Lay it flat to dry so it doesn’t stretch out of shape.
Can a beginner really make a bag?
Absolutely. A simple drawstring bag only needs basic stitches worked in the round, and it’s a wonderful first project.
Lining a bag is easier than it sounds: cut fabric slightly larger than the crocheted shape, sew it into a pouch, and stitch it inside along the top edge. For holiday gifting, start a few weeks ahead, especially if you plan to make several, so you can enjoy the process instead of rushing. Once you’re comfortable, you might love trying more crochet holiday ideas to keep the creative fun going all year.
So there you have it: a handmade Christmas bag really is within reach, even if you only picked up a hook last month. Start with the simple drawstring bag, keep your tension steady, and let the festive colours do the heavy lifting. Once you’ve finished one, you’ll probably find yourself eyeing leftover yarn and thinking about a second.
That’s the lovely thing about crochet patterns for christmas. They give you a cheerful, low-pressure excuse to practise skills that carry straight over to every other bag you’ll ever want to make. The base, the shaping, the eyelets, the finishing touches: it’s all the same toolkit, just wearing a little holly and red ribbon. Today’s gift bag could easily turn into next season’s market tote or a sturdy everyday carryall.
Don’t worry about perfection, either. A slightly wonky stripe or a drawstring that’s a touch too long still makes a gift feel personal, and the person opening it will notice the care, not the flaws.
So pick your colours, grab your hook, and cast on this weekend. When you’re ready for your next project, wander through the other crochet and craft tutorials here on Time To Scrap. Happy stitching!