
The easiest granny square patterns use nothing fancier than chains and double crochet stitches, and most of them work up in an evening with leftover yarn from your stash. Start with a classic solid square, learn the rhythm of working into corners, and you can branch out from there. No special tools, no tricky stitches, and no need to buy a single new skein.
Granny squares are a beginner’s best friend because the pattern repeats. Once round one clicks, rounds two and three are the same moves with a little more room. They’re also wonderfully versatile. The same simple motif can become part of a blanket, a scarf, or home decor.
Since you’re a paper crafter at heart, I’ve gone a step further. Below you’ll find eight easy patterns, each with step-by-step guidance or an expert tip, and many are sized for mixed-media projects like cards, embellishments, bookmarks, and handmade gifts. Think of tiny flower-center squares tucked onto a card front, or striped squares tied onto gift tags. Grab your scrap bin and a hook, and let’s get stitching.
How These Granny Square Ideas Were Chosen for Paper Crafters
Choosing these eight patterns wasn’t about finding the fanciest squares. It was about finding the ones that make you feel capable right away. If you’re new to mixing yarn with paper, our guide on Scrapbooking 101 pairs nicely with this list, but you don’t need any crochet experience to begin. Here’s what I looked for:
- Easy stitches that a beginner can learn in one sitting.
- Patterns that use up leftover scrap yarn.
- Small, lightweight squares that won’t weigh down a page.
- Designs that sit happily alongside paper and cardstock.
- Gift-friendly projects that work up quickly.
Free granny square patterns are a natural fit for leftover yarns and scraps, and they make inexpensive gifts that come together fast. Simple stitches and colorful yarns also keep things approachable for beginners, so you can focus on enjoying the process rather than wrestling with something fussy.
I also kept scaling up in mind. The same easy squares that dress up a card can grow into blankets, scarves or home decor when you feel ready. Think of each pattern as a small, low-pressure project that opens a door to bigger ones later.
Before You Start: A Mini Toolkit for Yarn-and-Paper Projects
You don’t need a big haul to begin. Grab a smooth, light-colored beginner yarn in a few colors (a smooth yarn makes your stitches easier to see) and a hook that matches the size on the yarn label. Add a pair of sharp scissors and a blunt yarn needle for weaving in ends. If you’re already stocked for paper crafting, you’ve got most of what you need, and the list of supplies to start is a handy reference for the paper side.
On that side, keep some cardstock, a strong adhesive that grips fiber, and a sturdy needle for stitching through paper.
Three terms will come up again and again:
– Chain: a simple loop stitch that forms a foundation or a gap between stitches. Pull a new loop through the one on your hook, and repeat.
– Double crochet: a taller stitch, made by wrapping the yarn around your hook before inserting it and pulling through in stages.
– Slip stitch: a flat, low stitch used to join rounds or finish off neatly.
That’s it. With these, you’re ready for every pattern below.
1. The Classic Solid Granny Square, the Perfect First Stitch Practice
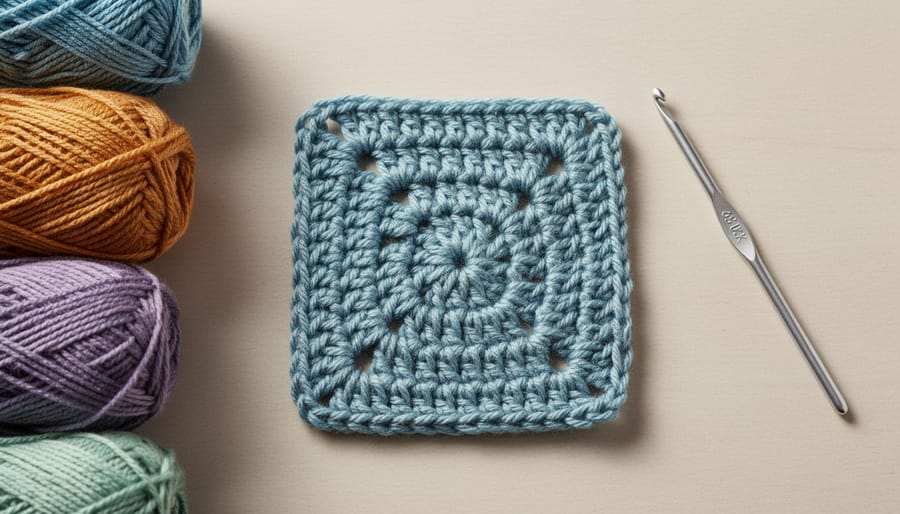
If you’ve never picked up a crochet hook, this is the square to start with. It uses only chains and double crochets, and every round repeats the same moves, so your hands learn the rhythm fast. Grab one color, or two if you want a pop of contrast on the final round.
1. Make a magic ring, or chain 4 and join with a slip stitch to form a loop.
2. Round 1: Chain 3 (this counts as your first double crochet). Work 2 more double crochets into the ring, chain 2, then repeat that group of 3 double crochets and a chain 2 three more times. Slip stitch to the top of the starting chain to close.
3. Round 2: Slip stitch to the nearest corner space. Chain 3, work 2 double crochets, chain 2, and 3 double crochets in that same space. Chain 1, then repeat in each corner, adding a chain 1 between corners.
4. Round 3 and beyond: Work a corner in each corner space, and one group of 3 double crochets in every side space between them.
Stop at three or four rounds if you want a card-sized piece. A small square like this is perfect for mounting on a card front. Dab a little strong adhesive on the back, or stitch it down through punched holes, and you’ve got a handmade focal point.
Expert tip: Count your stitches at every corner. Each corner should always hold exactly 3 double crochets, a chain 2, and 3 more double crochets. If the count drifts, your edges start to curve and the square stops lying flat against paper.
2. The Scrap-Yarn Rainbow Square for Using Up Leftovers
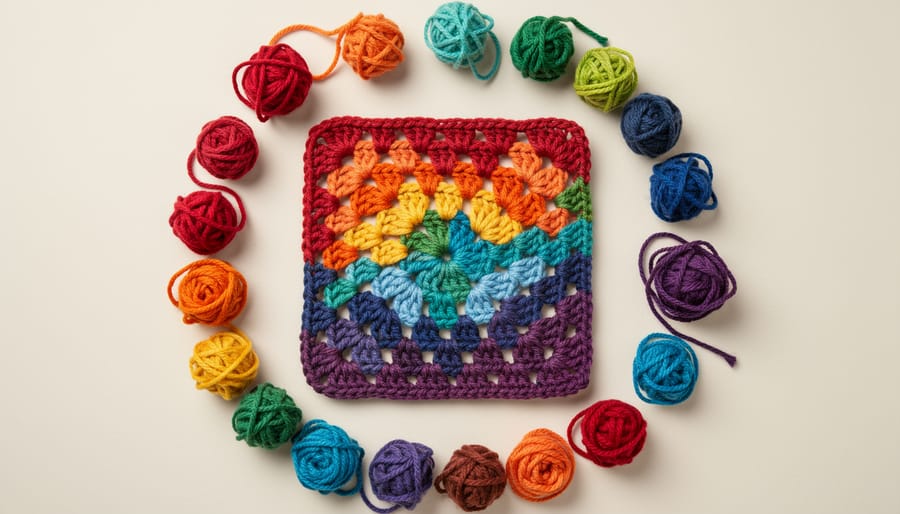
Granny squares are famously good at using up leftovers, and the rainbow version puts every scrap to work. Start with a magic ring or a small chain loop, then give each round its own color. Finish a round with a slip stitch, snip the yarn with a few inches to spare, and join the next color at a corner space. Starting each new color in the same corner keeps your color changes tidy and lines up the ends for finishing.
Pick shades that sit well together, such as warm tones fading into cool ones, so the rounds feel like a rainbow instead of a jumble. Even odds and ends of different weights can work if you keep each round fairly snug.
A flat back matters once you start gluing, so take a minute to weave every end into the stitches before you do anything else. Mounted on a card front, a small rainbow square makes a bright focal point, especially over a plain cardstock panel. If you’re choosing a base, browse these types of papers to find one sturdy enough to hold the yarn.
3. The Mini Flower-Center Granny Square for Card Embellishments
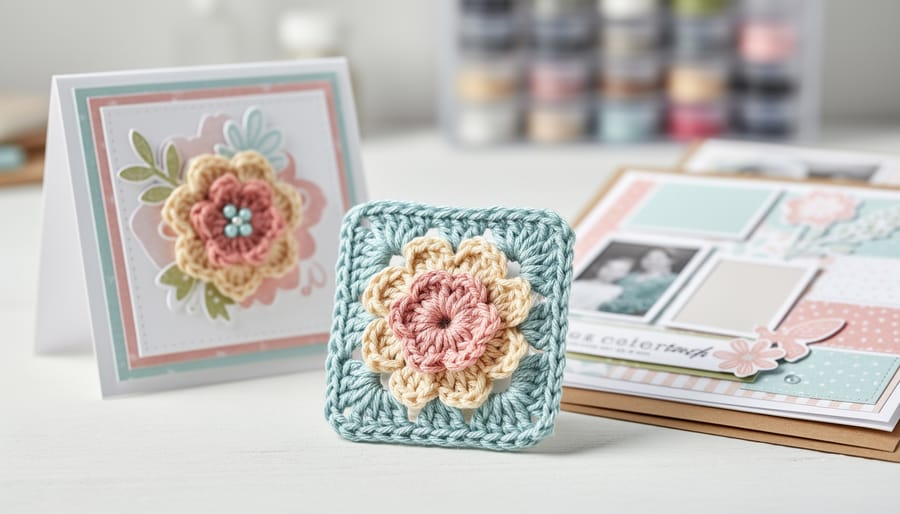
Here’s a little square with a lot of personality. The mini flower-center granny square borrows the popular flower-themed crochet look and shrinks it down to card size, so it works as a dimensional embellishment instead of a full project.
Start the center in a bright contrasting color, like yellow or pink, and work just a few simple rounds so it reads as a flower. Then switch to a calmer shade for the outer rounds that form the square. Stop after two or three rounds in total, and your square will sit comfortably in the palm of your hand, about the right scale for a card front.
Weave in your ends neatly on the back so nothing bulges. Then it’s time to attach it. Dab a small amount of strong glue only on the back of the square, pressing gently so the yarn doesn’t flatten. If you want a deeper look at using adhesive with textured pieces, that guide is a handy reference.
Expert tip: place the square slightly off-center and tuck a paper leaf or two behind it for an easy floral layout.
4. The Two-Color Striped Square for Gift Tags and Toppers
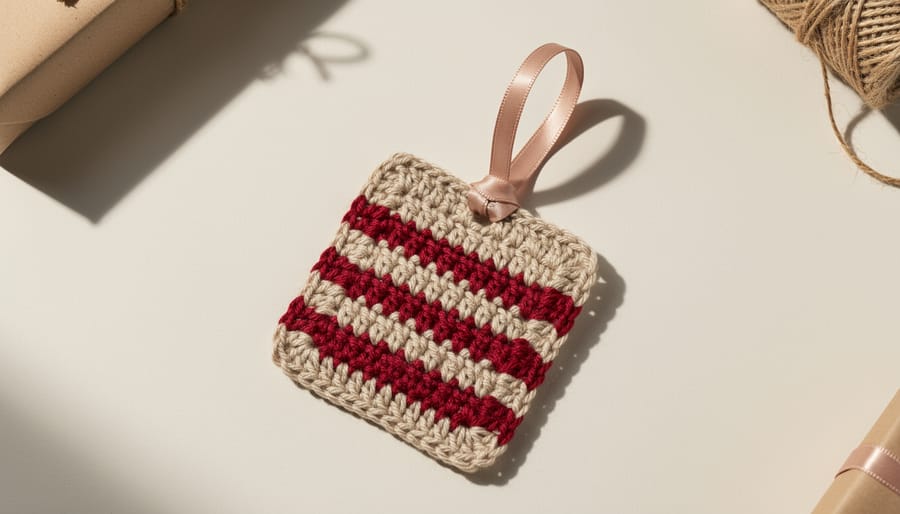
Two colors, same simple stitches, and you get a square that looks far more polished than it has any right to. Work one round in your first color, then switch to the second for the next round and keep alternating. Those tidy stripes read as a deliberate design, which is exactly what you want on a small handmade gift.
Pick two colors with good contrast, like deep teal against cream, so the stripes pop. Keep the square small, around three to four rounds, so it sits nicely on a package without overwhelming it.
To turn it into a gift tag or topper, here’s a quick way to finish it:
1. Weave in all your ends so the back stays flat.
2. Cut a piece of cardstock slightly larger than the square, and glue the crochet piece to the center with a strong adhesive.
3. Punch a hole in one corner of the cardstock.
4. Thread a length of ribbon through and tie a loop.
Expert tip: tie the ribbon loop around the package’s bow, and the tag becomes a keepsake the recipient can pull off and reuse. It’s an inexpensive, scrap-friendly touch that makes any present feel personal.
5. The Open-Lace Granny Square for Window Cards and Layered Pages
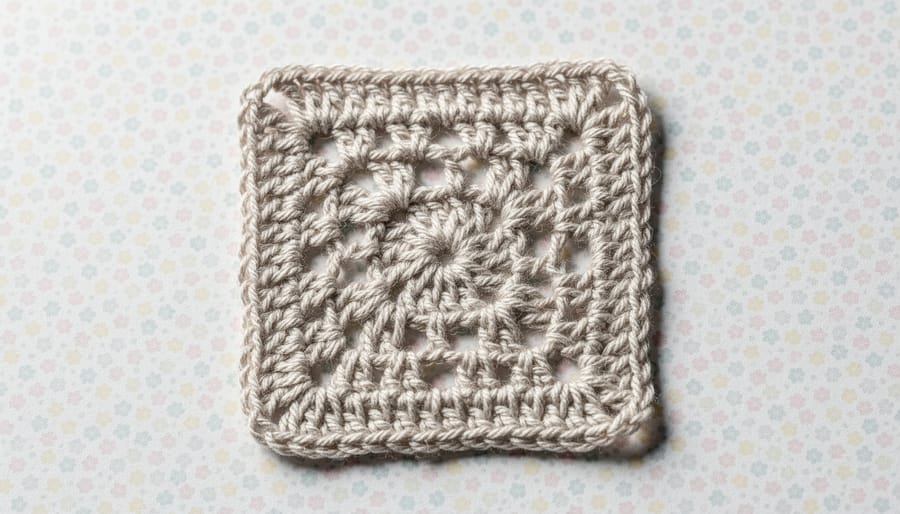
The open-lace granny square is the airy cousin of the classic. Instead of packing every stitch tight, you work clusters separated by chain spaces, which leaves small gaps all around the motif. That’s the fun part for paper crafters: whatever sits underneath shows right through.
Try mounting one square over a bright piece of cardstock or a scrap of patterned paper on a scrapbook page. The color peeks out through the holes, so the square works like a lace overlay. On a greeting card, a lace square layered over a contrasting background looks far fancier than the effort it takes. If you’ve already got a stash of leftover yarn, pick one solid color so the pattern underneath does the talking.
Here’s the tip that saves the most frustration: block it lightly. Lay the finished square flat, mist it with water until it’s just damp, and gently pat the corners square. Let it dry completely before attaching it to paper, and it will sit flat instead of curling. Once you’re comfortable with this lacy stitch, the same chain-space rhythm carries over into larger projects like crochet blanket patterns.
6. The Granny Square Bookmark and Journal Charm
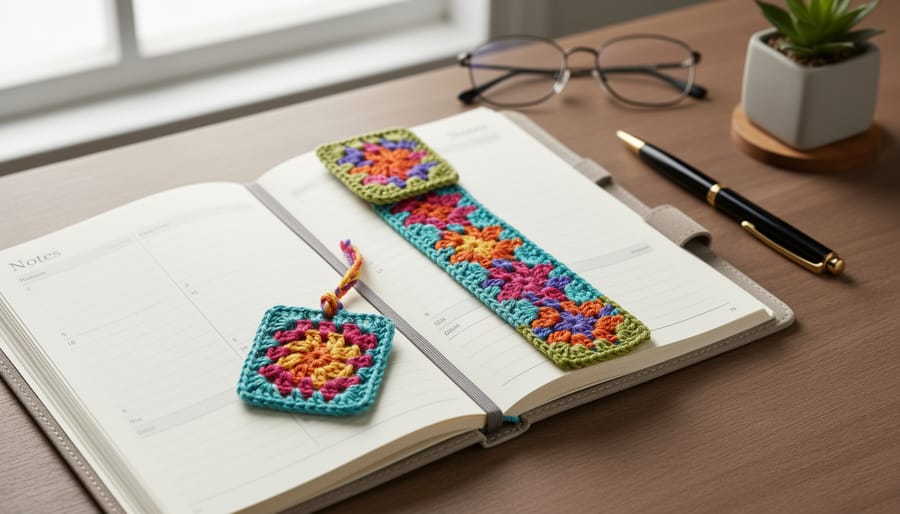
A single granny square makes a bookmark that’s as practical as it is pretty, and it’s a great handmade gift for friends who journal or plan. Make one square in a color or two you love, then add a simple border to give it a neat, finished frame. A round of single crochet stitches worked evenly around the edge does the trick. Put an extra stitch in each corner so the square lies flat instead of curling.
Want something longer? Join three or four small squares in a short strip with a few slip stitches. That’s a lovely shape for slipping between journal pages. For a planner charm, use just one square instead.
Finish by threading a ribbon or a few lengths of yarn through a corner stitch. Fold the strands in half, pull the loop through, then pass the ends through the loop and tug snug to make a quick tassel. Trim the ends even, and you’ve got a charm ready to dangle from a spiral binding or tuck into a book.
Expert tip: pop a bit of cardstock behind a thin square so it holds its shape.
7. The Sampler Mini Squares for Scrapbook Page Borders
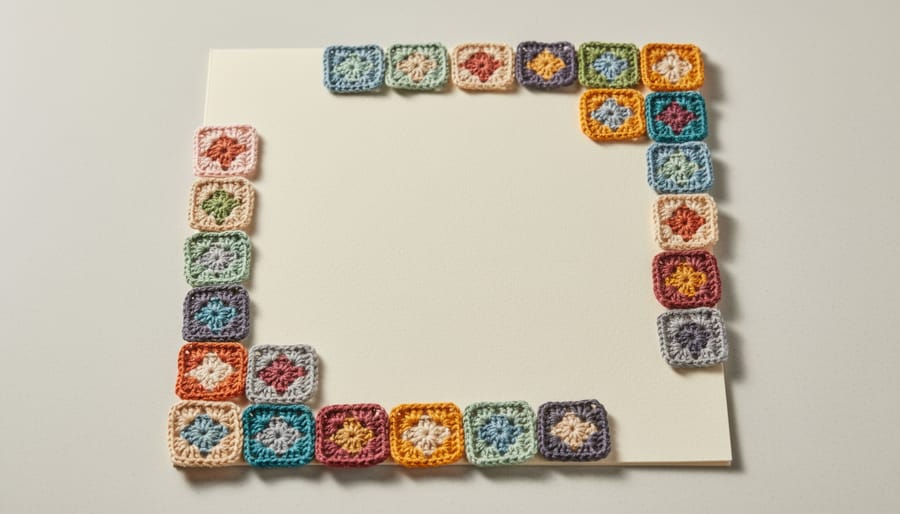
Tiny squares are the secret to a polished scrapbook border, and they’re a great way to use up leftover yarn. Make five or six palm-small squares, each just two or three rounds, so they stay flat and light.
Start with your palette. Pull two or three shades straight from your photos or patterned paper collection, then add one neutral to tie everything together. A cream or soft gray square between brighter ones gives the eye a place to rest.
Block each square lightly and weave in every end so nothing bumps up under your photos. Plan your layout before you glue anything. Lay the squares along an edge or tuck them into a corner, then step back and nudge the spacing until it feels balanced.
To attach them, skip the thick glue. Use a thin line of strong tacky adhesive or a few small adhesive dots on the back of each square, pressing from the center out. Too much glue seeps through the stitches and leaves stiff patches. Alternatively, stitch each square on with a few tiny stitches through the cardstock, which keeps the page flat and flexible.
8. The Starter Blanket Square, Scaling Up Beyond Paper
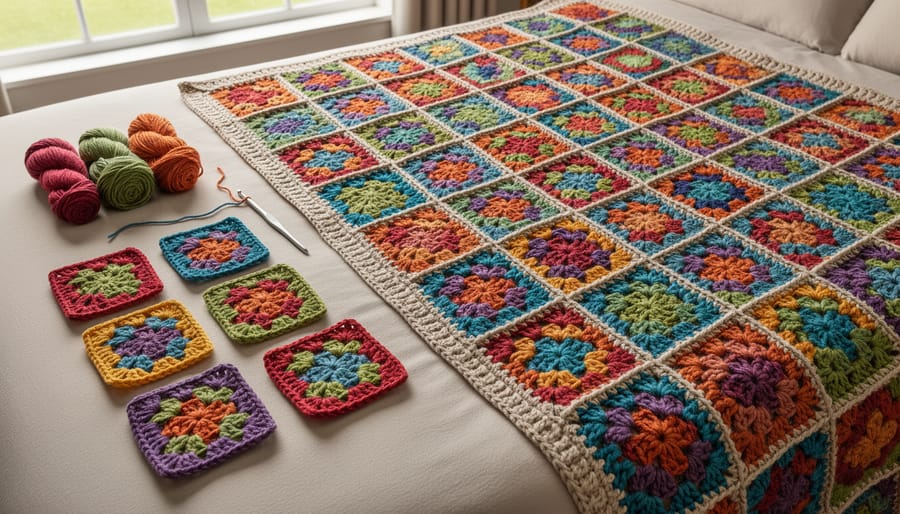
Once you’re comfortable with the basics, the best part is that you don’t need to learn anything new to go bigger. The same easy square you’ve been mounting on cards can be repeated, round after round and square after square, to make a baby blanket, a scarf or a piece of home decor. The pattern stays exactly the same, and only the number of squares changes.
Here’s how I’d approach it. Make a handful of squares in a coordinating palette, lay them out on a table, and shuffle them until the colors feel balanced. Then join them in rows with a simple slip stitch or whip stitch seam. A scarf might be a long strip of squares, while a blanket is a bigger grid. It’s the same skill you’ve already practiced, just repeated.
My favorite finishing touch is to make a few extra squares while you’re at it. Tuck them aside and use them as matching embellishments on a greeting card or gift tag, so the blanket and its card arrive as a coordinated set. It’s a thoughtful handmade gift, and it uses up even more of those leftover yarn scraps.
Common Questions About Easy Granny Squares and Paper Crafting
Granny squares are one of the friendliest places to start in crochet, and they pair beautifully with paper projects. Here are the questions beginners ask most.
Are granny squares good for beginners?
Yes. An easy granny square uses just a few simple stitches, and you can work it in colorful scrap yarn, so there’s very little pressure if a square doesn’t turn out perfectly. Start with the classic solid square and build from there.
Can I attach crochet to paper without damaging it?
Yes. Use a strong, flat-drying adhesive sparingly under the edges, or stitch through the cardstock with a needle for a sturdier hold. Keep the glue away from the centre so your square stays soft and doesn’t leave stains on the paper.
What yarn is easiest to start with?
Choose a smooth, light-colored yarn in a medium weight, since it shows your stitches clearly and doesn’t split on the hook. Leftover scraps work well too, which keeps your first squares cheap and cheerful.
How many squares make a blanket?
It depends on how big you make each square and how large you want the finished blanket. For a baby blanket, a modest grid of squares joined together usually does the job. Our starter blanket square is a good way to test your size before committing.
If your squares curl at the edges, don’t worry, it’s common. A light blocking, which means gently shaping the square flat and letting it dry, usually relaxes the curl. Counting your stitches at each corner as you go also helps keep the shape even from the start.
Start with the classic solid square, because once your hands know that rhythm, every other pattern on this list feels friendlier. From there, dig into your leftover yarn basket and let the colors surprise you. Scraps are exactly what these little squares were made for.
Then take a look at your paper side of the craft room. A stack of patterned cardstock might turn a mini flower-center square into the perfect card embellishment, or a striped square into a gift tag, or a few tiny sampler squares into a border for your next layout. Let the paper pile tell you where each finished piece belongs.
You don’t need a whole afternoon or a big plan. Grab a hook, pick two colors, and make one square today. It’s small, it’s quick, and it just might be the start of your favorite new mixed-media habit.