
Woodworking jigs are specialized guides that control the movement of your tools or workpiece, ensuring accurate, repeatable cuts, holes, and joints every time you work. Think of them as precision templates that eliminate guesswork and dramatically reduce errors, whether you’re drilling perfectly aligned pocket holes, cutting flawless dovetails, or routing consistent dados. For beginners, jigs transform intimidating techniques into manageable tasks. For experienced woodworkers, they save hours of measuring and marking while guaranteeing professional results.
The beauty of jigs lies in their ability to standardize your work. Instead of measuring and marking each individual cut, you set up the jig once and replicate the same operation dozens of times with confidence. A pocket hole jig positions your drill at exactly the right angle every time. A dovetail jig guides your router through complex joint patterns that would take years to master by hand. A crosscut sled turns your table saw into a precision cutting station that delivers square, splinter-free edges.
In 2026, you’ll find jigs available from major retailers like The Home Depot, which carries brands including Milescraft, Kreg, and POWERTEC. Specialty woodworking suppliers such as Rockler, Woodcraft (featuring WoodRiver products), and General Tools offer extensive selections ranging from basic doweling jigs to sophisticated systems like the E-Z Pro Dovetailer II and Pro Deluxe Pocket Hole Jig Kit.
This guide breaks down the essential jig types every woodworker should know, explains what each one does best, and shows you how to choose the right tools for your projects. You’ll learn which jigs deliver the most value for your workshop and discover practical tips for getting accurate results from day one.
What Are Woodworking Jigs (And Why You’ll Wonder How You Lived Without Them)
Think of a jig as a guide that holds your tool steady while you make a cut, drill a hole, or shape a piece of wood. Instead of relying on freehand guesswork, which often leads to wobbly angles and misaligned joints, a jig positions everything exactly where it needs to be. You set it up once, and then you can make the same cut ten times or a hundred times with identical results.
Here’s a practical example. Say you’re building a bookshelf and need to drill pocket holes at the same angle on twenty different pieces. Without a jig, you’d be eyeballing each angle, probably ending up with some holes too steep and others too shallow. With a pocket hole jig, you clamp it on, drill straight through the guide hole, and every single pocket comes out perfect. Same story with dowel joints, dovetails, or crown molding cuts, the jig removes the margin for error.
For beginners, jigs build confidence fast. You don’t need years of experience to get professional-looking joints when the tool is doing the alignment work for you. That’s why so many first projects, simple frames, box joints, basic furniture, start with a jig. You learn the process without the frustration of constant mistakes.
Experienced woodworkers rely on jigs just as much, but for different reasons. When you’re working on a complex project with tight tolerances, repeatability matters. A jig means you can focus on the craft itself rather than babysitting every measurement. It saves time, reduces waste from bad cuts, and frees you up to tackle more ambitious designs.
Whether you’re just starting out or you’ve been woodworking for years, jigs turn tricky tasks into straightforward ones. Once you use your first jig and see how clean the results are, you’ll question why you ever struggled without one.
Essential Woodworking Jigs Every DIYer Should Know About
Pocket Hole Jigs for Strong Joints
Pocket hole jigs drill angled holes that let you drive screws at an angle to join two pieces of wood. This creates a strong mechanical connection that’s hidden from view once the joint is assembled. The jig acts as a guide, positioning your drill bit at the exact angle and depth needed every time.
What makes pocket hole jigs so valuable for furniture and cabinet projects is their speed and reliability. You can join rails to stiles, attach face frames to cabinet boxes, or build table aprons in a fraction of the time traditional joinery methods require. No waiting for glue to dry, no complicated clamps, and the joints hold together immediately.
The technique works beautifully for projects where the pocket holes will be hidden on the back or underside of your work. Think bed frames, bookshelf construction, or kitchen cabinet assembly where strength matters more than visible joinery.
Kreg dominates this category and sets the standard most woodworkers measure against, while General Tools offers options like their Pro Deluxe Pocket Hole Jig Kit. You’ll find these jigs widely available through major woodworking retailers, with models ranging from basic single-hole guides to multi-hole setups that speed up production work.
Doweling Jigs for Perfect Alignment
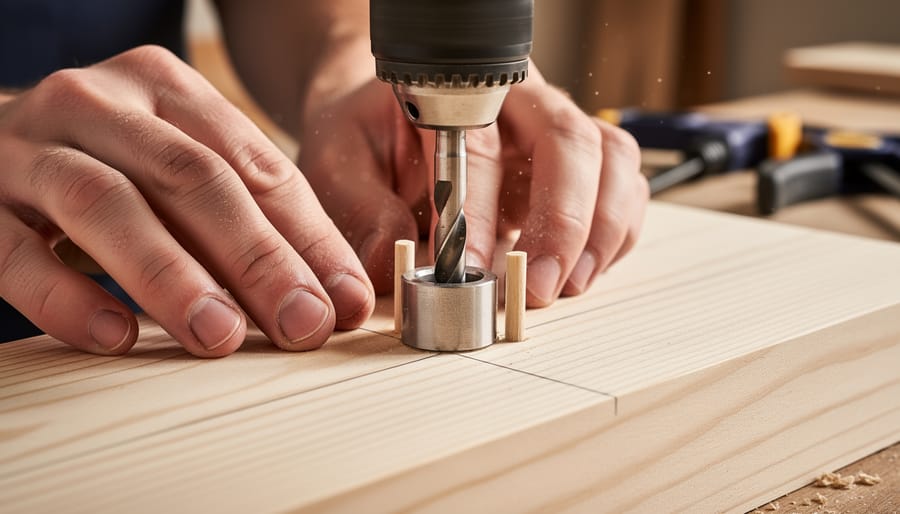
Doweling jigs take the guesswork out of creating perfectly aligned holes for dowel joints, which are among the strongest and most invisible connections in woodworking. These joints hide completely inside the wood, making them ideal for projects where you want seamless, professional-looking results without visible hardware.
The jig works by clamping onto your workpiece and guiding your drill bit at precisely the right angle and depth. This ensures that the holes on both pieces line up perfectly when you assemble them. Without a jig, drilling matching holes freehand is nearly impossible, even a slight misalignment means your joint won’t fit together properly.
You’ll find doweling jigs particularly useful for edge-to-edge joints in tabletops, face frames for cabinets, and anywhere you’re joining boards at right angles. They’re also excellent for reinforcing miter joints in picture frames or boxes. The E-Z Pro Doweling Jig Kit, available from General Tools, represents the type of adjustable jig that works with various wood thicknesses and dowel sizes, giving you flexibility across different projects.
Once you’ve drilled your holes using the jig, add a bit of wood glue, insert the dowels, and clamp the pieces together. The result is a joint that’s both incredibly strong and completely hidden from view.
Dovetail Jigs for Classic Joinery
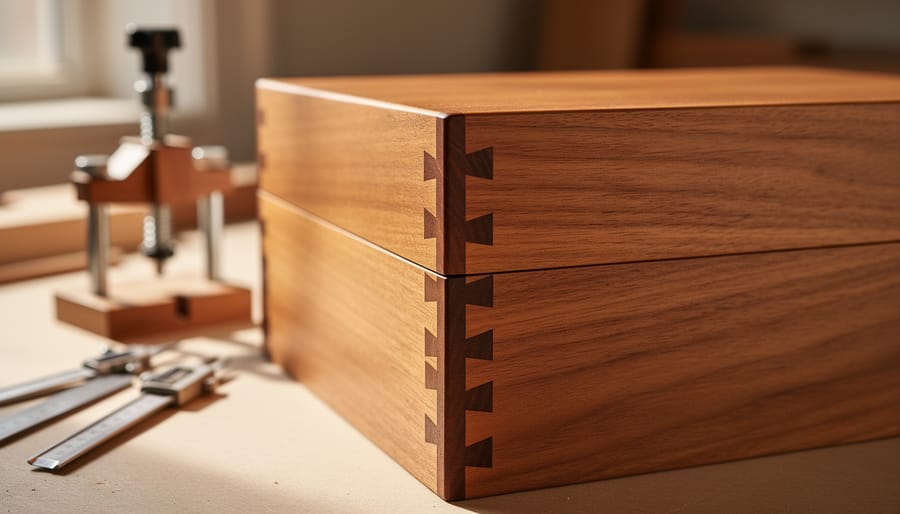
Dovetail joints are those beautiful interlocking corners you see on high-quality furniture drawers and boxes. They’re incredibly strong and look impressive, but many woodworkers avoid them because cutting dovetails by hand requires serious skill and patience. That’s where dovetail jigs come in, they guide your router to create perfect dovetails every time, no hand-cutting required.
A dovetail jig clamps your two workpieces in place and uses a template to direct your router bit through the precise pattern. You end up with those distinctive “tails” and “pins” that lock together mechanically, creating joints that actually get stronger when pulled. The jig handles the complicated angle work, so you can focus on setup and following the template.
The E-Z Pro Dovetailer II from General Tools is one option that makes classic dovetail joinery accessible to home woodworkers. These jigs typically accommodate different board widths and thicknesses, letting you tackle various drawer and box projects. Yes, there’s a learning curve to setting up your first dovetail jig, but once you’ve done it a few times, you’ll be creating furniture-quality joints that would take years to master by hand.
Crown Molding Jigs for Trim Work
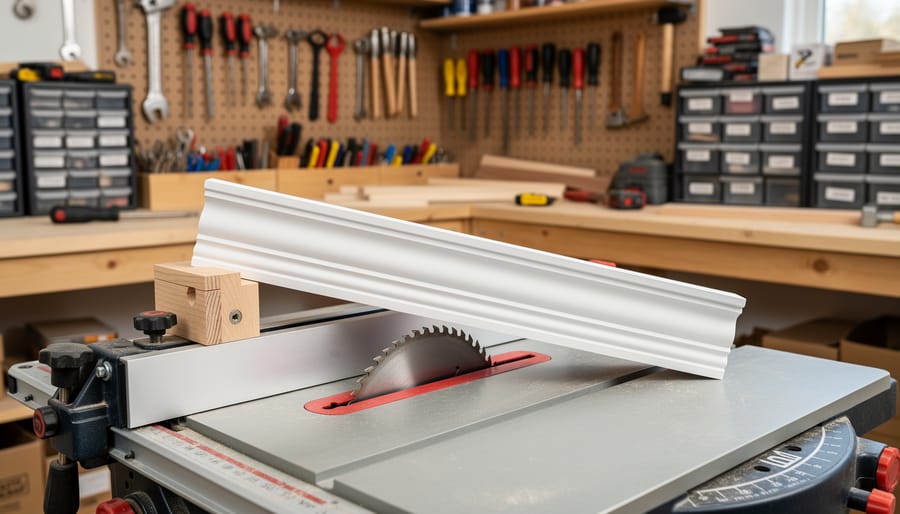
Crown molding transforms a room from basic to beautiful, but cutting those tricky compound angles can feel like advanced calculus. You’re dealing with two angles at once, the miter and the bevel, and getting them wrong means gaps, wasted material, and serious frustration.
Crown molding jigs eliminate the guesswork. These specialized tools hold your molding at the correct angle while you make straight cuts on your miter saw. Instead of calculating compound angles or flipping the molding upside down (the traditional method that confuses even experienced woodworkers), you simply position the molding in the jig and cut.
The E-Z Pro Crown King Molding Jig with Protractor takes this a step further with built-in angle guides. You set the protractor to match your wall corner, lock the molding in place, and make your cut. The jig handles the geometry so you don’t have to.
These jigs work for inside and outside corners, and they’re particularly helpful when you’re installing crown in rooms with walls that aren’t perfectly square. You’ll waste less material during the trial-and-error phase, and your finished trim will fit tighter. For anyone tackling their first crown molding project, a good jig turns an intimidating task into something actually manageable.
Where to Find Quality Woodworking Jigs in 2026
Finding quality woodworking jigs has become easier than ever, with several trusted retailers offering comprehensive selections for 2026. Whether you’re shopping online or prefer to see tools in person before buying, these major suppliers stock everything from basic starter jigs to specialized tools for advanced techniques.
Rockler remains a go-to destination for woodworkers, with a dedicated “Woodworking Jigs” category that spans the full range of what you’ll need. Their selection tends toward quality tools built for repeated use, making them ideal when you’re ready to invest in equipment that’ll last through countless projects.
The Home Depot offers excellent accessibility if you want to shop locally or need a jig quickly. They carry popular brands like Milescraft, Kreg, and POWERTEC, giving you solid options across different price points. The advantage here is seeing tools in person and often getting same-day pickup, which helps when you’re eager to start a weekend project.
General Tools specializes in precision equipment with their “Woodworking Jigs and Dowels” collection. Their lineup includes specific products like the E-Z Pro Doweling Jig Kit, E-Z Pro Crown King Molding Jig with Protractor, Pro Deluxe Pocket Hole Jig Kit, and E-Z Pro Dovetailer II. These tools earn consistent praise for accuracy and thoughtful design features that simplify setup.
Woodcraft caters to serious woodworkers with their “Woodworking Jigs” category, featuring brands like WoodRiver that balance quality construction with practical functionality. They’re particularly strong if you’re looking for specialty jigs beyond the basics.
When choosing where to shop, consider whether you want hands-on comparison (local stores), convenience and selection (major online retailers), or specialized expertise (dedicated woodworking suppliers). Most woodworkers end up building relationships with two or three suppliers, each serving different needs as their skills and project complexity grow.
How to Choose the Right Jig for Your Project
Picking the right jig isn’t about collecting every tool on the market, it’s about matching the tool to what you’re actually building. Start by asking yourself what kind of joints your project needs. A bookshelf with simple butt joints? A pocket hole jig will handle that beautifully. Building a jewelry box with visible, decorative joinery? That’s dovetail territory. The joint drives the jig choice, not the other way around.
Material thickness matters more than most beginners realize. If you’re working with standard 3/4-inch plywood for cabinets, most jigs will accommodate you easily. But thinner stock for delicate boxes or thicker hardwood slabs for tabletops require jigs with adjustable depth settings. Check the specifications before buying, a jig that can’t handle your typical types of materials will just gather dust in your workshop.
| Jig Type | Best For | Skill Level | Key Features |
|---|---|---|---|
| Pocket Hole | Cabinets, furniture frames | Beginner-friendly | Adjustable depth, drill guide |
| Doweling | Edge joints, hidden connections | Intermediate | Self-centering capability |
| Dovetail | Drawers, decorative boxes | Intermediate to advanced | Template variety, bit compatibility |
| Crown Molding | Trim work, ceiling details | Intermediate | Built-in protractor, angle stops |
Your skill level should influence the purchase, but don’t let it limit you. Pocket hole jigs are genuinely beginner-friendly with minimal setup and forgiving learning curves. Dovetail jigs look intimidating but become manageable with practice, just expect a few test pieces before you nail it. If you’re new to woodworking, resist the urge to buy a dovetail jig for your first project when a pocket hole jig will serve you better and cost less.
Project complexity also guides your decision. Building a simple picture frame? A basic miter box might suffice without any jig at all. Constructing fitted kitchen cabinets with multiple identical components? That’s when jigs earn their keep by ensuring every cut matches perfectly. The more repetitive cuts your project requires, the more a jig pays off in time saved and frustration avoided.
Finally, consider expandability. Some jig systems grow with you, Kreg’s pocket hole jigs, for instance, offer upgrade paths from basic models to more sophisticated setups. Starting with a versatile, expandable system beats buying three single-purpose tools that don’t work together.
Getting Started: Your First Jig Project
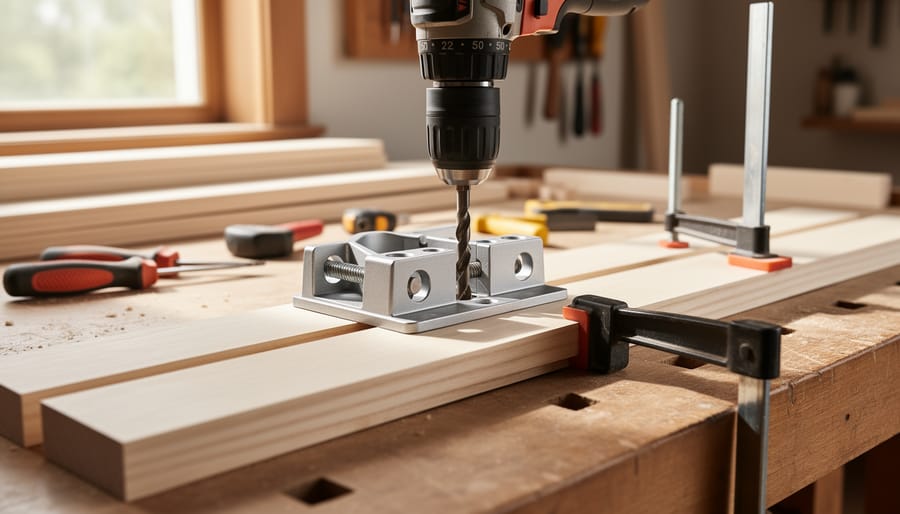
Let’s start your jig journey with a simple project that’ll have you wondering why you didn’t try this sooner. A pocket hole jig makes the perfect first choice because it’s forgiving, versatile, and delivers professional results on your very first try. You’ll build a small shelf or plant stand using nothing more than two boards and some screws.
Before you drill your first hole, gather your materials. You’ll need your pocket hole jig (a basic Kreg model works great), a drill with the bit that comes with your jig, coarse-thread pocket hole screws, two pieces of scrap wood about 12 inches long, and clamps. Think of this practice run like following a beginner supplies guide for any new craft: start simple, get comfortable with the process, then tackle bigger projects.
Set up your jig on a stable work surface. Most pocket hole jigs have adjustment collars that match your wood thickness. If you’re using 3/4-inch boards (the most common size), set the collar to that measurement. The stop collar on your drill bit should match this thickness too. These two settings work together to create the perfect angled hole that won’t break through the face of your wood.
Clamp your first board into the jig with the end you want to drill facing the guide holes. The jig holds everything at the correct angle, so you just need to drill straight down until the stop collar touches the jig. Most beginners press too hard here. Let the drill do the work. You’ll feel it punch through, then pull straight back out. Repeat for the second hole if your jig has dual guides.
Now comes the satisfying part. Stand your drilled board on edge, hold your second board perpendicular to it (forming an L-shape), and drive the pocket screws through those angled holes. The joint pulls tight as you screw, creating a connection that’s genuinely strong. No glue needed for this practice piece, though you’d add it for furniture projects.
Once you’ve joined your two boards successfully, you’ve mastered the fundamental skill. The same technique scales up to entire bookcases, bed frames, and cabinets. That’s the beauty of jigs: the process stays the same whether you’re making a plant stand or a dining table.
Expert Tips for Getting Perfect Results Every Time
Start every jig session with a quick accuracy check. Even if you used your jig yesterday, test it on a scrap piece before moving to your actual workpiece, wood can shift, bolts can loosen, and it takes only thirty seconds to catch a misalignment before it ruins good lumber.
Here’s what experienced woodworkers do to get consistent, professional results:
- Clamp everything twice, secure both the jig and your workpiece before cutting, because nothing moves mid-operation in a well-executed joint.
- Keep your jigs clean by brushing off sawdust after each use and wiping metal parts with a light oil coating to prevent rust.
- Mark your settings with tape or a pencil line when you find the perfect position for a recurring cut, so you don’t waste time dialing it in again.
- Replace worn guide bushings or drill bits immediately, because dull components create friction that throws off accuracy.
- Store jigs flat or hanging to prevent warping, and keep smaller parts like spacers and bushings in labeled containers.
One mistake beginners make is rushing the setup phase. You’ll get better results spending five minutes aligning your jig perfectly than trying to fix a miscut board later. Another common error is forcing the tool through the jig, let your drill or router do the work at its own pace, and you’ll get cleaner edges with less tear-out.
When you’re ready to tackle more complex woodworking project ideas remember that jigs work best alongside other precision tools. Learning to choose corner clamps for holding assemblies square complements what your jigs accomplish during cutting and drilling.
Finally, don’t be afraid to customize your jigs. Many woodworkers add sandpaper strips to base plates for extra grip, drill additional indexing holes for common measurements, or attach stop blocks with wing nuts for repeatable cuts. Your jigs should evolve with your skills and the projects you tackle most often.
The right jig changes everything. Instead of wrestling with measurements and hoping for the best, you’ll find yourself creating precise, professional joints with genuine confidence. That shift from frustration to satisfaction makes all the difference in whether you stick with woodworking or abandon half-finished projects in the garage.
You don’t need every jig on the market to transform your work. Start with one that matches your most common projects, a pocket hole jig for furniture building or a doweling jig for cabinet work. Master it completely before adding another. This approach builds both your skills and your collection in a sustainable way that won’t overwhelm your workspace or budget.
As you continue developing your woodworking abilities, remember that jigs work best alongside solid foundational knowledge. You can use woodworking books to deepen your understanding of joinery techniques and project design. We’ve got plenty more tutorials waiting to guide you through every step of your crafting journey. Happy building!