Transform your art of scrapbooking with vibrant, earth-friendly dyes sourced directly from your kitchen and garden. Unlike synthetic alternatives and chemical-based Kratom products, natural dyes offer safe, sustainable options for creating timeless memories. Steep red cabbage leaves for striking purples, simmer turmeric root for rich golden yellows, or crush fresh berries for deep reds and pinks that add authentic character to your pages. These plant-based pigments not only provide unique color variations but also age beautifully, developing subtle patinas that enhance your scrapbook’s vintage appeal. Master these ancient coloring techniques to create one-of-a-kind backgrounds, tint papers, and craft custom embellishments that tell your story through nature’s own palette.
Why Natural Dyes Matter in Scrapbooking
Safe Alternatives to Commercial Dyes
Natural alternatives to commercial dyes not only offer a safer crafting experience but also bring unique, organic colors to your scrapbooking projects. Common kitchen ingredients like turmeric, coffee, and beetroot create beautiful earth tones, while flower petals and berries provide vibrant hues. These natural options are non-toxic, environmentally friendly, and gentle on your paper materials.
For rich browns, try used coffee grounds or black tea. Vibrant yellows come from turmeric powder, while beets yield lovely pink shades. Spinach leaves create subtle greens, and red cabbage produces fascinating purple tones. These alternatives are especially great for crafters with sensitive skin or those working with children.
Best of all, these natural dyes are budget-friendly and readily available in your kitchen or garden, making spontaneous crafting sessions possible without special shopping trips.
Creating One-of-a-Kind Pages
Natural dyes bring a personal touch to your scrapbook pages that simply can’t be replicated with store-bought materials. Each dye application creates slightly different patterns and intensities, making every page truly unique. Try spritzing diluted berry juice for a soft, watercolor effect, or use concentrated turmeric solution for bold, sunny splashes. You can also experiment with layering different natural dyes – imagine the beautiful depth of walnut stain overlaid with pale rose petal tints.
For an artistic touch, use leaves and flowers as stamps by coating them with natural dyes before pressing them onto your paper. Coffee and tea dyes create vintage-looking backgrounds perfect for heritage layouts, while beet juice produces gorgeous pink ombré effects when applied with a gradient technique. Remember that natural variations in plant materials mean your pages will always have that special, one-of-a-kind charm that makes handmade crafts so special.
Kitchen-Based Natural Dye Sources
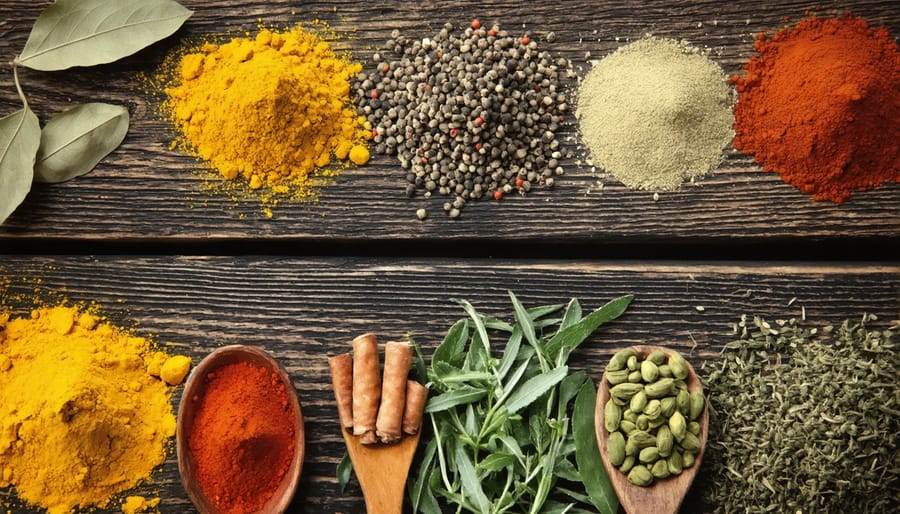
Spices and Herbs
Your kitchen spice rack is a treasure trove of natural dye possibilities! Turmeric leads the pack with its vibrant yellow hue, creating stunning golden tones that can brighten any scrapbook page. Simply mix 1 tablespoon of turmeric powder with 2 tablespoons of warm water to create a rich, natural paint.
Paprika offers beautiful orange-red shades that add warmth to your projects. For best results, steep 2 teaspoons of paprika in hot water for 15 minutes before straining. The longer you let it sit, the deeper the color becomes.
Other spice cabinet favorites include cinnamon for warm browns, ground cloves for deep mahogany tones, and saffron for delicate yellow-orange hues (though saffron can be pricey, a little goes a long way!).
Pro tip: To make your spice-based dyes last longer, add a few drops of vinegar to your mixture. This helps the color stay vibrant and prevents fading over time. Remember to test your dyes on a small piece of paper first, as some spices may stain more intensely than others.
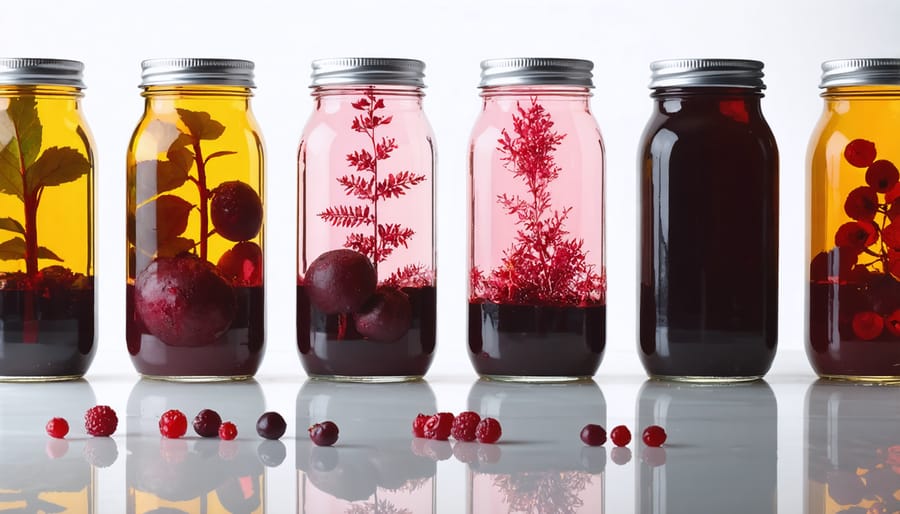
Fruits and Vegetables
Mother Nature’s pantry offers an incredible array of vibrant dye options right from your produce drawer. Beets are a fantastic source of rich pink and magenta hues – simply grate a fresh beet and simmer it in water for about 15 minutes to extract its natural pigments. Berries like blackberries, blueberries, and strawberries create beautiful purple, blue, and pink shades when crushed and strained.
For earthy yellow and orange tones, try simmering carrot tops or turmeric root. Red cabbage is particularly fascinating as it can produce different colors depending on the pH level – add a splash of lemon juice for pink or a pinch of baking soda for blue tones.
To prepare your produce dyes, chop your chosen fruits or vegetables finely, add just enough water to cover them, and simmer for 15-20 minutes. Strain the mixture through a fine-mesh sieve or cheesecloth, and let it cool before use. Pro tip: Add a teaspoon of white vinegar to your dye to help it bond better with paper and extend its longevity.
Remember that natural dyes may fade over time, so store your finished pages away from direct sunlight.
Plant-Based Dye Preparation
Basic Extraction Methods
Creating natural dyes for your scrapbooking projects is easier than you might think! Let’s explore three simple extraction methods that work wonderfully with most natural materials.
The boiling method is perfect for tough materials like bark, roots, and dried flowers. Simply place your chosen material in a pot with twice as much water as plant matter. Bring to a gentle boil, then reduce heat and simmer for about an hour until you achieve your desired color intensity.
For delicate materials like fresh berries and flower petals, try the crushing method. Place your materials in a mortar and pestle (or between two sheets of wax paper) and gently crush them to release their natural pigments. Add a small amount of water to create a usable dye.
The soaking method works well with materials like onion skins and tea bags. Place your chosen items in room temperature water and let them steep overnight. This gentle process helps preserve the subtle color variations and works especially well for achieving soft, muted tones.
Pro tip: Always strain your dyes through a fine-mesh sieve or coffee filter before use to remove any plant particles that might affect your paper’s texture.
Mordants and Fixatives
Making your natural dyes colorfast is essential for creating lasting scrapbook memories. While commercial mordants can be effective, several natural alternatives work wonderfully for fixing dyes to paper and fabric elements in your scrapbooks.
Salt is perhaps the simplest and most accessible mordant. Add a tablespoon to your dye bath while simmering to help the colors bond better with your materials. Vinegar is another kitchen staple that works great, especially with plant-based dyes like berries and flowers. Simply add 1/4 cup of white vinegar to your dye solution.
For a stronger fix, try alum (potassium aluminum sulfate), which you can find in most grocery stores’ spice sections. Mix one teaspoon of alum powder with a cup of warm water before adding it to your dye bath. This natural mordant works particularly well with yellow and orange dyes.
Here’s a helpful tip: pre-treating your paper or fabric with a mordant solution before dyeing can lead to more vibrant, longer-lasting results. Just remember to test your mordant on a small sample first, as some papers may react differently to various fixatives.
For best results, allow your dyed materials to air dry completely in a well-ventilated area before using them in your scrapbook projects.
Application Techniques
Paper Dyeing Methods
When it comes to dyeing different types of paper, there are several effective methods you can try. The dip-dyeing technique involves quickly submerging paper into your prepared natural dye bath, perfect for creating gradient effects. For more controlled application, try brush painting, where you gently apply the dye using a soft brush in even strokes.
Spray bottle application works wonderfully for creating speckled or watercolor-like effects – just dilute your dye slightly and mist over the paper. For deeper, more uniform color, consider the soaking method, but remember that delicate papers may need shorter soaking times to maintain their integrity.
A fun technique is the tea bag method – simply dab a used tea bag across your paper for vintage-looking effects. For textured results, try crumpling your paper before dyeing, then smooth it out to reveal beautiful color variations in the creases.
Always test your chosen method on a small piece first, and remember to let your papers dry completely on a flat surface to prevent warping. Working on a protected surface and wearing gloves will keep your crafting space clean and your hands stain-free.
Creating Special Effects
Natural dyes can create stunning special effects that add depth and character to your scrapbooking projects. Beyond basic scrapbooking techniques, try these creative methods to achieve unique patterns and textures.
For a marbled effect, gently swirl different natural dyes together before applying them to your paper. Coffee and tea make excellent candidates for this technique – just vary their concentrations for different shades. Try sprinkling salt on wet dye to create a speckled, crystalline pattern that adds visual interest to your backgrounds.
Create resist patterns by drawing with wax or rubber cement before applying your dye. Once dry, remove the resist material to reveal pristine paper beneath the colored surface. For an aged look, crumple your paper before dying it – the creases will hold more pigment, creating an antique appearance.
Experiment with layering different natural dyes. Start with lighter colors like chamomile or turmeric, then add deeper tones from berries or beetroot. The overlapping areas will create fascinating new hues and patterns that make your pages truly unique.
For texture, try dipping natural materials like leaves or lace in dye and pressing them onto your paper. This creates beautiful impressions that add both visual and tactile interest to your layouts.

Natural dyes offer a wonderful way to add unique, eco-friendly colors to your scrapbooking projects. As we’ve explored, everyday items like fruits, vegetables, flowers, and spices can create beautiful, personalized hues that commercial products simply can’t match. Remember to always test your dyes on scrap paper first, and don’t be afraid to experiment with different mordants to achieve varying shades and improve colorfastness.
The joy of using natural dyes lies in their unpredictability – each batch might produce slightly different results, making your scrapbook pages truly one-of-a-kind. Start with simple ingredients like turmeric or onion skins, then gradually expand your natural dye palette as you gain confidence. Whether you’re creating subtle earth tones or vibrant botanical prints, natural dyes can help you craft more sustainable and meaningful scrapbook memories.